In high-speed PCB design, the characteristic impedance of controllable impedance boards and lines is one of the most important and common problems. First understand the definition of a transmission line: a transmission line is composed of two conductors with a certain length, one conductor is used to send signals, and the other is used to receive signals (remember the concept of "loop" instead of "ground"). In a multi-layer PCB board, each line is a part of the transmission line, and the adjacent reference plane can be used as the second line or loop. The key to a line becoming a "good performance" transmission line is to keep its characteristic impedance constant throughout the line.
The key for a circuit board to become a "controllable impedance board" is to make the characteristic impedance of all circuits meet a regular value, usually between 25 ohms and 70 ohms. In multilayer circuit boards, the key to good transmission line performance is to keep its characteristic impedance constant throughout the line.
But what is characteristic impedance after all? The easiest way to understand the characteristic impedance is to see what the signal encounters during transmission. When moving along a transmission line with the same cross-section, this is similar to the microwave transmission shown in Figure 1. Suppose a voltage step wave of 1 volt is added to this transmission line. For example, a 1 volt battery is connected to the front end of the transmission line (it is located between the transmission line and the loop). Once connected, the voltage wave signal travels along the line at the speed of light. Propagation, its speed is usually about 6 inches/nanosecond. Of course, this signal is indeed the voltage difference between the transmission line and the loop, and it can be weighed from any point of the transmission line and the adjacent point of the loop. Fig. 2 is a diagram showing the transmission of the voltage signal.
Zen’s approach is to “generate a signal” and then propagate it along this transmission line at a speed of 6 inches per nanosecond. The first 0.01 nanosecond travels 0.06 inches. At this time, the sending line has excess positive charge, and the loop has excess negative charge. It is the difference between these two charges that maintains the 1 volt voltage difference between the two conductors. And these two conductors form a capacitor.
In the next 0.01 nanosecond, to adjust the voltage of a 0.06 inch transmission line from 0 to 1 volt, it is necessary to add some positive charge to the sending line and add some negative charge to the receiving line. For every 0.06 inches of movement, more positive charge must be added to the transmission line, and more negative charge must be added to the loop. Every 0.01 nanoseconds, it is necessary to stop charging another section of the transmission line, and then the signal starts to propagate along this section. The charge comes from the battery at the front end of the transmission line. When it moves along this line, it charges the continuous part of the transmission line, so a voltage difference of 1 volt is formed between the transmission line and the loop. Every 0.01 nanosecond of travel, some charge (±Q) is taken from the battery, and the constant amount of electricity (±Q) flowing out of the battery within a constant time distance (±t) is a constant current. The negative current flowing into the loop is practically equal to the positive current flowing out, and it is just at the front end of the signal wave. The alternating current passes through the capacitor formed by the upper and lower circuits to complete the entire cycle.
PCB (Printed Circuit Board) abbreviation for printed circuit board.

The detailed method is as follows
1. Purpose and Function
1.1 Standard design work, improve consumption efficiency and improve product quality.
2. Scope of application
1.1 VCD super VCDDVD sound and other products of the development department of XXX company.
3. Responsibility. manner
3.1 All electronic engineers, technicians and computer drafters in the XXX Development Department.
4. Qualifications and training
4.1 Have a foundation in electronic technology;
4.2 Have basic computer operation knowledge;
4.3 Familiar with the application of computer PCB drawing software.
5. Work instruction (the length unit is MM)
5.1 Minimum line width of copper foil: 0.3mm for the panel, 0.2mm for the panel, and 1.0mm minimum for the edge copper foil
5.2 Minimum gap of copper foil: panel: 0.3MM, panel: 0.2MM.
5.3 The minimum distance between the copper foil and the board edge is 0.55MM, the minimum distance between the component and the board edge is 5.0MM, and the minimum distance between the plate and the board edge is 4.0MM
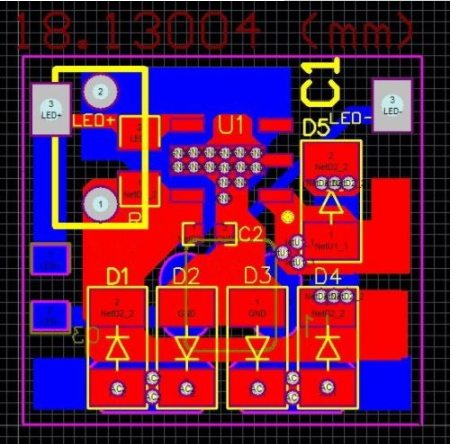
5.4 The size (diameter) of the pad of ordinary through-hole device components is twice the aperture, the minimum of double-sided board is 1..5MM, and the minimum of single-sided board is 2.0MM. If you can't use round pads, use waist circle Shaped pad, as shown in the figure below (if there is a standard component library,
Then the standard component library shall prevail)
The relationship between the long side and short side of the pad and the hole is:
5.5 Electrolytic capacitors cannot touch heating elements, high-power resistors, varistors, voltage devices, heaters, etc. The minimum distance between the decapacitor and the radiator is 10.0MM, and the minimum distance between the component and the radiator is 2.0MM.
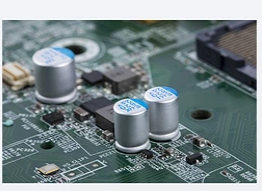
5.6 Large-scale components (such as transformers, electrolytic capacitors with a diameter of 15.0mm or more, high-current sockets, etc.) increase the copper foil and upper tin area as shown in the figure below; the shadow local area must be the same as the pad area.
5.7 There can be no copper foil (except grounding request) components within the screw hole radius of 5.0MM. (as required by the structure drawing).
5.8 There should be no silk screen oil on the upper tin position.
5.9 If the center distance between the pads is less than 2.5MM, the adjacent pads must be wrapped with silkscreen oil, and the width of the ink is 0.2MM (0.5MM is recommended).
5.10 Do not place jumpers under the IC or under the motors, potentiometers, and other components with roughly metal shells.
5.11 In the large-area PCB design (about more than 500CM2), avoid the PCB board bending when passing through the soldering furnace, and leave a 5 to 10mm wide gap in the middle of the PCB board without placing components (wiring), which is used to pass the soldering furnace. When adding pressure strips to avoid bending of the PCB board, the shaded area in the following figure::
5.12 Each transistor must be marked with e, c, b feet on the silk screen.
5.13 For components that need to be soldered after passing through the tin furnace, the plate must be driven away from the tin position, and the direction is opposite to the passing direction. The size of the viewing hole is 0.5MM to 1.0MM as shown in the figure below:
5.14 When designing a double panel, pay attention to the metal shell components. The shell and the printed board are in contact with the printed board during plug-in. The top pad must not be opened. It must be covered with green oil or silk screen oil (such as two-pin crystal oscillator).
5.15 In order to reduce the short circuit of the solder joints, all the double-sided printed boards have no green oil windows in the via holes.
5.16 A solid arrow must be used to mark the direction of the tin furnace on each PCB:
5.17 The minimum interval between holes is 1.25MM (double panel is invalid)
5.18 When planning, the placement direction of the DIP packaged IC must be perpendicular to the direction through the soldering furnace, not parallel, as shown in the figure below; if there are difficulties in planning, the allowable placement of the IC (OP packaged IC placement direction is opposite to DIP ).
5.19 The wiring direction is degree or vertical, and the degree of turning from vertical to the degree must go 45 degrees to enter.
5.20 The placement of components is horizontal or vertical.
5.21 The silk screen characters are placed in degrees or 90 degrees to the right.
5.22 If the width of the copper foil into the round pad is smaller than the diameter of the round pad, then teardrops should be added. As shown in the figure:
5.23 The material code and design number should be placed on the empty space of the board.
5.24 Reasonably use the center without wiring as grounding or power supply.
5.25 The wiring should be as short as possible. Pay special attention to the shorter wiring of clock lines, low-level signal lines and all high-frequency loops.
5.26 The ground wire and power supply system of analog circuit and digital circuit should be completely separated.
5.27 If there is a large area of ground wire and power wire area on the printed board (the area exceeds 500 square millimeters), part of the window should be opened. As shown in the figure:
5.28 The positioning hole rules of the electrical plug-in printed board are as follows. Components cannot be placed in the shadows, except for hand-plugged components. The range of L is 50 330mm, and the range of H is 50 250mm., If it exceeds 330X250, it will be replaced with a manual board. The positioning hole must be on the long side.
Basic concept of PCB design
1) Use as little as possible
Once a via is selected, be sure to handle the gap between it and the surrounding entities, especially the gap between the lines and the vias that are easily ignored by the middle layers and the vias. If it is automatic routing, you can Select the "on" item in the Via Minimiz8tion submenu to automatically process it. (2) The larger the current-carrying capacity required, the larger the size of the required vias. For example, the vias used to connect the power layer and ground layer to other layers will be larger.
3. Silk screen layer (Overlay)
In order to facilitate the installation and maintenance of the circuit, the required logo patterns and text codes are printed on the upper and lower surfaces of the printed board, such as component label and nominal value, component outline and manufacturer logo, date of consumption, etc. When designing the relevant content of the silk screen layer, many beginners only pay attention to the uniform and beautiful placement of the text symbols, and neglect the PCB effect produced by practice. On the printed board they designed, the characters were either blocked by the component or invaded the soldering area and wiped off, and some of the components were marked on the adjacent components. Such various designs will bring a lot to assembly and maintenance. inconvenient. The correct guideline for the layout of characters on the silk screen layer is: "No ambiguity, see stitches, beautiful and generous".
4. The particularity of SMD
There are a large number of SMD packages in the Protel package library, that is, surface soldering devices. The biggest feature of this type of device in addition to its small size is the single-sided dispersion of pin holes. Therefore, when choosing this type of device, it is necessary to define the surface of the device to avoid "missing pins (Missing Plns)". In addition, the relevant text annotations of this type of component can only be placed along the surface where the component is located.
5. Grid-like filling area (External Plane) and filling area (Fill)
Just like the names of the two, the network-shaped filling area is to dispose of a large area of copper foil into a network, and the filling area is only to keep the copper foil intact. Beginners often don't see the difference between the two on the computer during the design process. Essentially, you only need to zoom in on the picture to understand it. It is precisely because it is usually difficult to see the difference between the two, so when using it, it is even more careless to distinguish between the two. It should be emphasized that the former has a strong effect on suppressing high-frequency interference in circuit characteristics, and is suitable for needs. A large-area filled center is especially suitable when certain areas are used as shielding areas, partitioning areas, or high-current power lines. The latter is mostly used in the center of ordinary line ends or transfer areas where a small area is required to be filled.
6. Pad
The pad is the most frequently contacted and most important concept in PCB design, but beginners are easy to ignore its selection and modification, and use circular pads in the design. To select the pad type of the component, it is necessary to comprehensively consider the shape, size, layout, vibration and heating conditions, and force direction of the component. Protel provides a series of pads of different sizes and shapes in the package library, such as round, square, octagonal, round and positioning pads, but sometimes this is not enough and needs to be edited by myself. For example, for pads that generate heat, are subject to greater stress, and have greater currents, they can be designed into a "teardrop shape". In the design of the line output transformer pin pads of the color TV PCB that everyone is familiar with, many manufacturers are just In this way. Generally speaking, in addition to the above, when editing a pad by yourself, you should also consider the following guidelines:
(1) When the shape does not differ in length, consider that the difference between the connection width and the specific side length of the pad should not be too large;
(2) It is often necessary to use asymmetric pads with asymmetrical length when wiring between component lead angles;
(3) The size of the pad hole of each component should be edited separately according to the thickness of the component pin. The guideline is that the size of the hole is 0.2 to 0.4 mm larger than the diameter of the pin.
7. Various types of membranes (Mask)
These films are not only indispensable in the PCB manufacturing process, but also a necessary condition for component welding. According to the position of the "membrane" and its function, the "membrane" can be divided into component surface (or welding surface) soldering mask (TOp or Bottom) and component surface (or soldering surface) solder mask (TOp or BottomPaste Mask). It’s just like that. The solder mask is a layer of film that is applied to the pad to improve the solderability, that is, the light-colored round spots on the green board are slightly larger than the pad. The situation of the solder mask is just the opposite, in order to make The finished board conforms to soldering methods such as wave soldering, and it is required that the copper foil on the non-pad on the board cannot be tinned. Therefore, a layer of paint must be applied to all parts other than the pad to prevent tin from being applied to these parts. Visible, These two membranes are a complementary relationship. From this discussion, it is not difficult to be sure that the menu
Similar to the settings of "solder Mask En1argement" and other items.
8. Flying line, flying line has two meanings:
(1) A rubber band-like network connection used for inspection during automatic wiring. After the components are imported through the network table and a preliminary plan has been made, the "Show command" can be used to see the network connection under the plan., Adjust the position of the components from time to time to minimize this kind of interleaving, in order to obtain the largest automatic wiring routing rate. This step is very important, it can be said that sharpening the knife and not cutting firewood by mistake, it takes more time and value! In addition, automatic wiring After finishing, which networks have not been deployed, you can also use this function to find out. After finding out the network that has not been deployed, you can manually compensate, if you can’t really compensate, you will use the second meaning of "flying line", that is, in the future Use wires to connect these networks on the printed board. What needs to be confessed is that if the circuit board is a large-volume automatic line production, this flying line can be regarded as a resistance element with a 0 ohm resistance and a uniform pad spacing.
To stop the design.
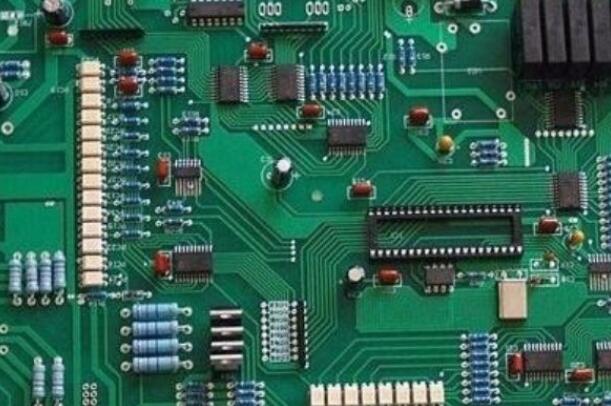
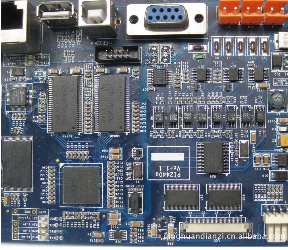
Printed circuit board (PCB) is almost present in every kind of electronic device. If there are electronic parts in a certain device, they are all mounted on PCBs of different sizes. In addition to fixing various small parts, the main function of PCB is to provide electrical connection between the upper parts. As electronic devices become more and more complex, more and more parts are required, and the circuits and parts on the PCB are becoming more and more dense. The standard PCB looks like this. The bare board (no parts on it) is also often called "Printed Wiring Board (PWB)".
The base plate of the board itself is made of insulating and heat-insulating materials that are not easy to bend. The small circuit material that can be seen on the outside is copper foil. The copper foil was originally covered on the entire board, but part of it was etched away during the manufacturing process, and the remaining part became a network of small lines. . These lines are called conductor patterns or wiring, and are used to provide circuit connections for parts on the PCB.
In order to fix the parts on the PCB, we solder their pins directly on the wiring. On the most fundamental PCB (single panel), the parts are concentrated on one side, and the wires are concentrated on the other side. In this way, we need to make holes in the board so that the pins can pass through the board to the other side, so the pins of the parts are soldered to the other side. Because of this, the front and back sides of the PCB are called Component Side and Solder Side respectively