1 Introduction
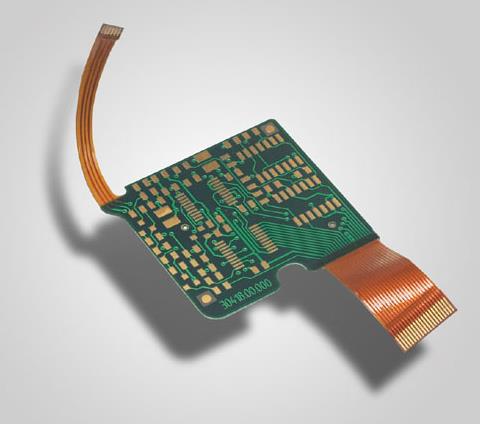
The SMT process uses solder or solder paste to form a mechanical and electrical connection between the components and the PCB board. Its main advantages are small size, light weight, and good interconnectivity; high-frequency circuits have good performance and parasitic impedance. Significantly reduced; good shock and vibration resistance. When using the SMT process, the leads do not need to pass through the circuit board, which can avoid the generation of signals received or radiated by the leads, thereby improving the signal-to-noise ratio of the circuit. To evaluate the performance of the SMT process, first of all, the solder joints should be formed correctly; the premise of correct formation is that the pad size of the components on the PCB board must be reasonably designed; secondly, the density of the components should be reasonably arranged during the PCB board layout. , to meet the requirements of the test point. When doing circuit board design, it is done through DFM (Design for Manufacturability). DFM is an important part of the key technology of concurrent engineering (CE). It starts from product design, considers manufacturability and detectability, and is an effective tool for circuit board design from design to manufacturing success.

2. PCB board material selection
There are two main types of printed circuit board substrates: organic substrate materials and inorganic substrate materials, and organic substrate materials are mostly used. The PCB board substrates used are also different for different layers. For example, prefabricated composite materials are used for 3 to 4-layer boards, and glass-epoxy materials are mostly used for double-sided boards. During the lead-free electronic assembly process, due to the increase in temperature, the degree of bending of the printed circuit board increases when it is heated. Therefore, in SMT, it is required to use a board with a small degree of curvature, such as FR-4 and other types of substrates. Due to the influence of the expansion and contraction stress on the components after the substrate is heated, the electrodes will be peeled off and the reliability will be reduced. Therefore, the material expansion coefficient should be paid attention to when selecting materials, especially when the components are larger than 3.2×1.6mm. PCB boards used in surface assembly technology require high thermal conductivity, excellent heat resistance (150℃, 60min) and solderability (260℃, 10s), high copper foil adhesion strength (above 1.5×10⁴Pa) and bending strength ( 25×104Pa), high electrical conductivity and small dielectric constant, good punch ability (accuracy ±0.02mm) and compatibility with cleaning agents, in addition, the appearance is required to be smooth and flat, and no warping, cracks, scars and rust spots appear. The thickness of the printed circuit board is 0.5mm, 0.7mm, 0.8mm, 1mm, 1.5mm, 1.6mm, (1.8mm), 2.7mm, (3.0mm), 3.2mm, 4.0mm, 6.4mm, of which 0.7mm and 1.5 The PCB board with a thickness of mm is used for the design of double-sided boards with gold fingers, and 1.8mm and 3.0mm are non-standard sizes. From the perspective of production, the size of the printed circuit board should not be less than 250 × 200mm, and the ideal size is generally (250 ~ 350mm) × (200 × 250mm). Use puzzles. The surface assembly technology specifies the bending amount of the substrate with a thickness of 1.6mm as the upper warpage ≤ 0.5mm, and the lower warpage ≤ 1.2mm. Usually, the allowable bending rate is below 0.065%.
3. PCB board via holes and component layout
3.1 Via Layout
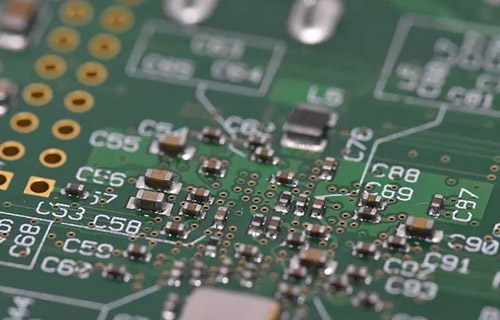
1) Avoid placing vias within or within 0.6mm of the surface mount pad.
2) Component pads without external pins (such as chip resistor capacitors, adjustable potentiometers, capacitors, etc.) are not allowed to have through holes between the pads (that is, no through-holes are opened under the components; Solder film blocking can be excluded) to ensure cleaning quality.
3) As the via hole for test support, when designing the layout, it is necessary to fully consider the spacing of probes with different diameters during automatic online testing.
4) The matching gap between the through-hole diameter and the component leads is too large, and it is easy to solder. Generally, the through-hole diameter is 0.05-0.2mm larger than the lead diameter, and when the pad diameter is 2.5 to 3 times the through-hole diameter, it is easy to form a qualified solder joint.
5) Vias and pads cannot be connected to avoid solder loss or thermal isolation. If the via hole needs to be connected to the pad, it should be interconnected with thin wires (less than 1/2 the width of the pad or 0.3mm~0.4mm) as much as possible, and the distance between the via hole and the edge of the pad is greater than 1mm.
3.2 Component layout
When performing the reflow soldering process, the following points should be paid attention to in the arrangement direction of the components:
1) The distribution of components on the board should be as uniform as possible (uniform heat and space);
2) The components should be arranged in the same direction as possible to reduce the phenomenon of poor welding;
3) The spacing between components should be greater than 0.5mm to avoid insufficient temperature compensation;
4) There should be some maintenance and testing space around PLCC, SOIC, QFP, and other large devices;
5) The power components should not be concentrated, and should be arranged separately on the edge of the PCB board or in a location with good ventilation and heat dissipation;
6) Do not place valuable components in high-stress concentration areas such as edges, corners, or near plug-ins, mounting holes, slots, panel cuts, and gaps of the PCB to reduce cracks or cracks.
3.3 Component Orientation
When performing the wave soldering process, the following points should be paid attention to in the arrangement direction of the components:
1) All passive components should be parallel to each other;
2) The longer axes of SOIC and passive components should be perpendicular to each other;
3) The long axis of passive components should be perpendicular to the direction of movement of the board along the conveyor belt of the wave soldering machine;
4) Polarized surface mount components should be placed in the same direction as possible;
5) When soldering multi-pin components such as SOIC, tin stealing pads, or pad area additions should be set at the two solder feet in the direction of solder flow to prevent bridging;
6) Components of similar type should be arranged on the board in the same direction, making component placement, inspection, and soldering easier;
7) When using different assembly processes, the adaptability of the component pins and weight to the reflow soldering or wave soldering process should be considered to prevent parts from being dropped or soldered. Four-sided pinned device.
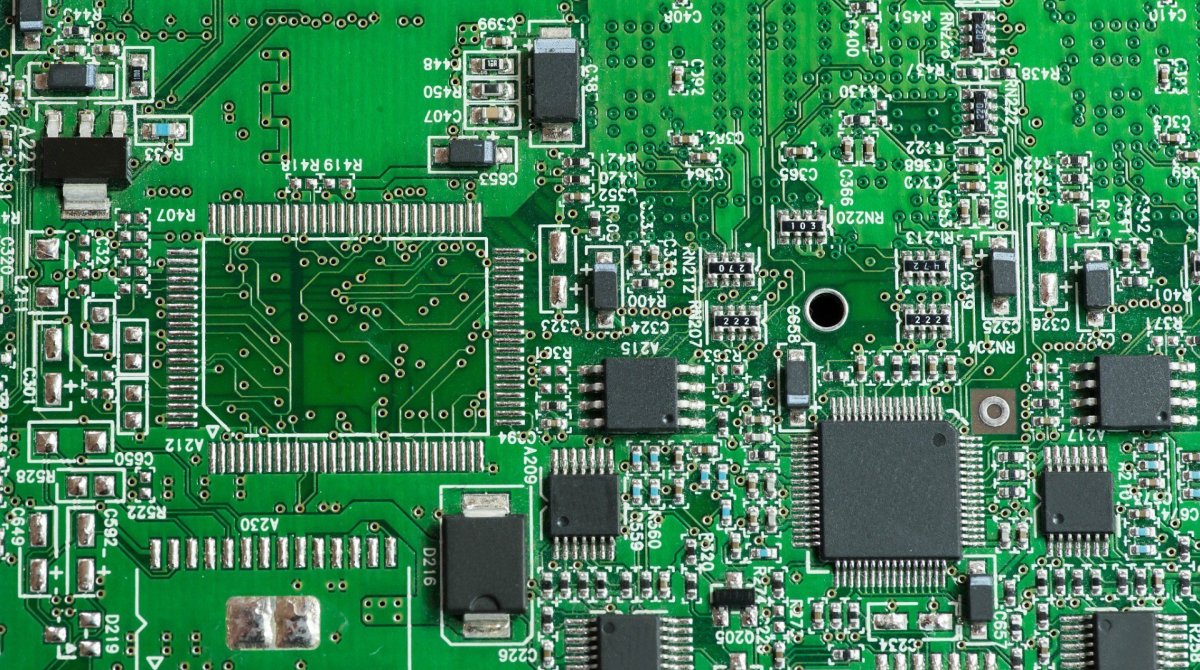
4. PCB circuit and pad design
4.1 Requirements for circuit process design
1) The clamping edge of the printed circuit board process is 5mm.
2) Avoid connecting the wire with the pad at a certain angle, and try to make the wire perpendicular to the pad of the component, and the wire should be connected to the pad from the center of the long side of the pad.
3) Reduce the width where the wire connects to the pad unless limited by factors such as charge capacity, processing limit, etc., the width is 0.4mm or half the width of the pad (whichever is smaller). One is to prevent the heat dissipation from being too fast, and the other is to prevent the solder mask from being inaccurate enough, causing the solder to flow and form poor soldering.
4) Printed circuit board wire structure: traces made by normal etching technology with a line width and spacing of 0.6mm; thin traces made by fine line etching technology with a line width and spacing of 0.3mm; line width 0.3mm, Ultra-fine traces with a pitch of 0.15mm.
5) Different assembly methods have different wiring requirements. The lead width of the insertion method is more than 0.2mm, the lead width of the mount method is 0.1 to 0.2mm, and the width of the fine pitch assembly lead is 0.05 to 0.1mm.
6) The interconnection line (especially the fine-pitch pin device) should be avoided as far as possible between its pads. Any interconnection line passing through the adjacent pads must be shielded with a solder mask.
7) For multi-pin components (such as S0IC, QFP, etc.), the short connection between the pin pads is not allowed to pass through. Separation can be excluded), so as not to cause displacement or be mistaken for bridging after welding.
8) When designing a PCB board with unpackaged chips (bare chips), the square-shaped pads of the bare chips should be grounded instead of floating; in addition, in order to ensure reliable bonding, the pads must be evenly plated with gold. For directional components, such as triodes, chips, etc., pay attention to their polarity when wiring.
4.2 Circuit electrical design requirements
1) The principle of wire-passing within the pin spacing: low density requires two wires with a wire diameter of 0.23mm to pass within a 2.54mm pin center distance; medium density requires a wire diameter to pass within a 1.27mm pin center distance It is a 0.15mm wire; high density requires 2 to 3 thinner wires within the 1.27mm pin center distance.
2) The width of the printed board lines should be as consistent as possible, which is conducive to impedance matching. In terms of the production process of printed boards, the width can be 0.3mm, 0.2mm and 0.1mm, but as the lines become thinner and the spacing becomes smaller, the quality will be difficult to control during the production process. Unless there are special requirements, it is generally appropriate to use the wiring principle of 0.3mm line width and 0.3mm line spacing.
3) Try to take short lines, especially for small signal circuits, the shorter the line, the smaller the resistance and the less interference, and the length of the coupling line should be shortened as much as possible.
4) The wiring direction of the multilayer board: according to the power layer, the ground layer and the signal layer are separated to reduce the interference between the power supply, the ground and the signal. Moreover, it is required that the line copyright method of two adjacent layers of printed boards should be perpendicular to each other or follow diagonal lines and curves, rather than parallel lines, so as to reduce the coupling and interference between substrate layers.
5) Design principles of power lines and ground lines: the larger the wiring area, the better, in order to reduce interference. For high-frequency signal lines, use ground wire to shield. The large-area power supply layer and the ground layer should be adjacent to each other, and its function is to form a capacitor between the power supply and the ground to play a filtering role.
4.3 Pad Design
The size of the pad has a great influence on the manufacturability and life of SMT products, and is an extremely critical part of the PCB circuit design. have played a significant role. The production requirements of components are different. The pad design should be produced according to the specifications of the components, so as to ensure the reliability of the circuit and prevent process defects (such as tombstones and skew), showing the superiority of SMT. In the specific design, it must also be designed according to the assembly density of the specific product, different processes, different equipment and the requirements of special components. At present, there is no unified standard for surface-mounted components. Different countries and different manufacturers have different shapes and packages of components. Therefore, when designing the size of the pad, it should be consistent with the package shape and pins of the components you choose. and so on, determine the pad length and width. Commonly used component pad design can refer to some standards, such as IPC-SM-782, IPC-7095, IPC-7525, IEC-TC52 WG6, JIS C-5010 and electronic industry process standard compilation.
The following points should be followed when designing the pads:
1) For the same device, for the pads used symmetrically, the overall symmetry should be strictly maintained in the design, that is, the shape and size of the pad pattern should be exactly the same;
2) For the same device, the pad design adopts the package size and value parameters to calculate the pad size to ensure a wide range of application of the design results;
3) When designing the pad, the reliability of the solder joint mainly depends on the length rather than the width;
4) The pad design should be appropriate: if it is too large, the solder spreads out larger and the resulting solder joint is thinner; if it is too small, the surface tension of the pad copper foil to the molten solder is too small. When the surface tension of the copper foil is smaller than the surface tension of the molten solder Under tension, the formed solder joints are non-wetting joints;
5) When the pad is connected to a large area of conductive area (such as ground, power supply, etc.), it should be thermally isolated by a thinner wire, generally with a width of 0.2 to 0.4 and a length of about 0.6mm.
6) The pad design in wave soldering is generally larger than that in reflow soldering, because the components in wave soldering are fixed with glue, and the pad is slightly larger, which will not endanger the displacement and uprightness of components, but can reduce the "shading effect of wave soldering". ".
4.4 The relationship between the pad width C of the rectangular component (L×W) and the width W of the soldering end of the component is: C=W×(0.7~1.3)mm. For RC components below 0805, C≤W; for RC components above 0805, C=W+0.1~0.25mm. The length is about 0.9mm, and the pad spacing is A=L-0.7mm.
The thickness varies greatly. For example, the resistor is only about half of that of the capacitor. Attention should be paid to the pad design. Especially for small-sized RC components, good wetting welding on the side of the terminal should be considered. In addition, the top and bottom of the end welding area of the Yuanyuan two-terminal chip component are not completely consistent. For reliable welding, end-side immersion welding is also required. Therefore, the pads are required to be larger than the pads of the components.
4.5 Cylindrical element (φD×L)
MELF component pad pattern design formula: the width of the pad is C=D×(0.7~1.0)mm=φmax, the length S=Lmax-(Lmin-2I), about 1mm, and the distance between the two pads is A=Lmax -2S=Lmin-2I, about L-1mm. (The ideal design only considers the component tolerance, and does not consider the placement error.) During the specific production, considering the component placement error, the size should be slightly enlarged. During reflow soldering, the width increases by 0.05~0.1mm and the length increases by 0.2~0.3mm; during wave soldering, the width increases by 0.1mm and the length increases by 0.2~0.6mm. In addition, during the reflow soldering process, it is desirable to open a gap in the pad design so that the components can be positioned during the reflow soldering process. The notch depth dimension F=(Lmax-A)/2, the notch depth E is 0.3mm (for small size components, such as 1/8W resistor) and 0.4mm (for larger size components, such as 1/4W resistor). Since the thickness of the copper layer of the general pad (including the plating layer and solder mask layer) will not exceed 0.2mm, the gap E should not be too large.
4.6 SOP (wing lead), QFP package device
There is no standard calculation formula for the pad design of this type of device, which is relatively difficult. The width C of the pad should be equal to (or slightly larger/smaller) the width of the solder end (or pin), generally C=W+0.1mm. The length of the pad is usually 2.0±0.5mm, generally B=T+b1+b2, where b1=0.45~0.6mm, which is beneficial to the solder joints with a good meniscus profile when the solder is melted, and can also effectively avoid soldering. It is appropriate to have bridge defects and take into account the placement deviation of components; b2 = 0.25 ~ 1.5mm, mainly to ensure that the solder joints with a meniscus profile can be formed, (for SOIC, QFP and other devices should also take into account its For SOIC and QFP devices, the length of the pad is B=T+(0.6~0.8) mm, the distance between the centers of the pads is equal to that of the chip itself, and the gap between the pads is equal to ( or slightly smaller) the gap between the leads. For IC chips such as SO and SOJ with a pin spacing of more than 1.27mm, the pad width is C≤1.2W, the pin spacing is between 0.65 and 1.27, and the pad width is C≥W, generally C=W+0.1~0.25mm; For IC chips up to 0.65mm including 0.65mm pin pitch, the pad width should be equal to the width of the pins. The width of the QFP pad should be equal to the width of the pin, C=W+0.1mm; for fine-pitch QFP, sometimes the pad width should be appropriately reduced, such as when there are leads passing between the two pads. Pad length B=L+(0.6~1.0)mm, pad spacing A=F-0.25mm.
At the same time, the longer pad increases the surface tension between the solder paste and the pad, which facilitates the release of the solder paste and brings convenience to the solder paste printing process. It has also been proved in practical application that there is an interference area before and after the lead on the pad, which is very beneficial to excess solder stock to reduce the risk of post-solder bridging.
4.7 Transistor (SOT)
The relationship between the pad width C and the component lead width W is: C≥W; pad length = component lead length + b1 + b2, where b1 = b2 = 0.3 ~ 0.5mm; the pad spacing is guaranteed to be equal to the lead center distance On the basis of , extend the four sides of each pad by at least 0.35mm.
4.8 SOJ, PLCC devices (J pin)
Pad design principle: (0.5~0.8mm)×(1.85~2.15mm); the center of the pin should be between the inner 1/3 of the pad pattern and the center of the pad; the spacing between the two rows of pads for SOJ is generally 4.9mm.
4.9 BGA pad design and dummy pad
The shape of the BGA pad is circular, and the diameter is 80% of the diameter of the solder ball. The metric size is used in the design, because the components are produced in the metric system, and the design in the inch system will cause placement deviation. Considering the assembly process factors, sometimes a dummy pad is designed under the two-terminal chip component. It is not used for welding, but for wave soldering, so it is called a puppet pattern. The pattern makes it easy for the glue to stick to the component, so that the component will not be stuck because the glue surface is too low.
5. Fiducial mark production requirements
1) The commonly used figures of datum marks are square, circle, triangle and cross. The diameter of the datum mark is 0.5mm and 3mm. Generally, 2 to 3 solid circles with a diameter of 1mm are placed on the diagonal line of the plate as a reference mark. If it is a puzzle, each puzzle should be designed with a datum mark;
2) The size of the marks on the same board should be the same, and the change should not exceed 25μm;
3) The reference point can be bare copper, or nickel-plated, tin-plated, and solder-plated (HASL, thickness 7-10 μm) on it. The thickness of the coating is 5 to 10 μm, not more than 25 μm, and the surface flatness of the reference point should be within 15 μm;
4) The datum point should be at least 5mm away from the edge of the printed board. For boards with irregular shapes, an additional 5mm edge should be added. Placed on the diagonal of the board and components, there should be no other circuit features around the reference point mark, and the size of the open area is equal to the diameter of the mark;
5) The jigsaw can adopt the separation technology of stamp plate or double-sided engraved V-shaped groove. The depth of the V-shaped groove is controlled within 1/6 to 1/8 of the thickness of the plate, and the length is controlled within 1/3 of the side; For PCB board without wave soldering, the front and back sides of the double-numbered board can be used in half, and the patterns on both sides can be arranged in the same way to improve equipment utilization