1. Purpose
Standardize the operation specifications of SMT placement machine equipment to ensure the safe and reliable operation of the equipment.
2 Scope of application
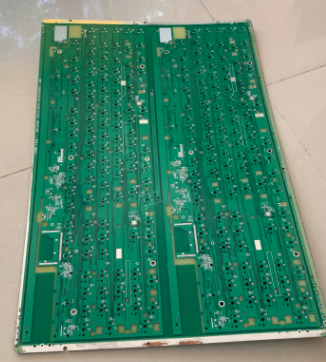
This procedure is applicable to the use and operation of SIPLACE D1 and D2 inside the SMT factory.
3 Standard requirements
Operators work strictly in accordance with the operating procedures, and severely deal with personnel who violate the operating procedures and cause equipment failures.
4 Operation steps and methods
4.1 Switching sequence of equipment
In view of the fact that the entire production line shares a regulated power supply, in order to avoid the start-up of high-power reflow soldering from affecting the operation of the placement machine and the screen printing machine, the operator must follow the power-on sequence as follows:
Turn on the reflow soldering machine first, and then turn on the power supply of the screen printing machine and the placement machine after the heating tube of the reflow soldering machine is fully working.
4.2 Mounter electrical operation
4.2.1 Switching operation of the placement machine

4.2.1.1 SIPLACE D2 switch machine: According to the patch production line from left to right, facing the operation surface of the device, there is a red knob (main power switch) on the back of the device, and the knob handle is in the horizontal position when it is turned off., Turn the knob 90 degrees clockwise to the vertical position. After the equipment is finished, use the mouse to control the computer to shut down the station computer operating system, and finally turn the red knob (main power switch) from the vertical state to the horizontal position by 90 degrees to the horizontal position to shut down.
4.2.1.2 SIPLACE D1 switch machine: According to the patch production line from left to right, facing the operation surface of the equipment, there is a red knob on the front of the equipment. This is the power switch knob of WPC-4 waffle tray feeder. Horizontal position, when turning on, turn 90 degrees to the right to the vertical position; there is a red knob (main power switch) on the back of the device. When turned off, the knob handle is in the horizontal position. When turning on, turn the knob 90 degrees clockwise to the vertical position. Vertical position.
4.2.1.3 SIPLACE D1 power-on sequence: turn on the power switch of WPC-4 waffle tray feeder first when starting up, and then turn on the power of the host. When shutting down, use the mouse to control the computer to turn off the platform computer operating system, and then turn off WPC-4 The power switch of the waffle tray feeder, and finally turn off the main power switch of SD1.
4.2.2 Opening the cover: There are two buttons on both sides of SIPLACED1, SIPLACED2 and the input side of the board. The white one is the Start button, and the black one is the Stop button. When the machine is powered on, you must press the Stop button before opening the cover. After the standby device stops working, you can open the cover for corresponding operations. After the operation is completed, close the cover, and then press the Start button. The machine will resume and wait. Job status.
4.2.3 Use of Feeder
4.2.3.1 Feeder installation: align the positioning slot at the front of the feeder (without signal cable side) with the fixed post at the front end of the feeder trolley, and then align the positioning hole at the rear of the feeder (signal cable side) at the rear of the feeder trolley The fixed column at the end is stuck in, and confirm that the feeder is adsorbed by the magnetic strip at the front of the feeding trolley and there is no gap at the bottom. Finally, pinch the white aluminum alloy square ring at the front end of the feeder signal cable with your hand, and align the red marking point on the cable head with the red marking strip on the signal cable socket at the corresponding position of the feeder and insert the signal cable to complete the installation of the feeder.
4.2.3.2 Feeder disassembly: hold the white aluminum alloy square ring at the front end of the feeder signal cable by hand to pull the signal cable out of the signal cable seat, and then grasp the tail (signal cable side) of the feeder and lift it up to make the feeder The positioning hole at the rear part is separated from the positioning column on the feeding trolley, and then the feeder can be taken out in the direction of the tray of the feeding trolley.
4.2.3.3 Detailed operation of Feeder (see the operator manual attached to the machine).
4.2.4 Removal and replacement of nozzle
4.2.4.1 Disassembly of the suction nozzle: Open the upper cover of the machine according to the operation steps in 4.2.2, and then pull the cantilever of the placement head that needs to replace the suction nozzle to the outside of the track. Grasp the blue handle on the placement head, pull the placement head closer to the operator, turn the rotating head with your hand, rotate the placement head to the position of the nozzle that needs to be replaced, and grasp the extension of the grating disc with your left hand (no fingers Buckle inward to prevent stains on your fingers from contaminating the grating disc), grab the suction nozzle with your right hand and pull out the suction nozzle.
4.2.4.2 Installation of the suction nozzle: align the notch on the suction nozzle with the horizontal corrugation of the central suction nozzle installation column of the mounting head grating disk, and then hear a "click" after a little force, and the suction nozzle is installed.
5 Safety precautions:
5.1 Operators must be trained, and unqualified personnel are not allowed to operate the placement machine.
5.2 When the placement machine is working, do not put your head or arms within the operating range of the cantilever or lifting platform.
5.3 Do not wear scarves, necklaces, or ties when working to reduce the risk.
5.4 Persons with long hair must wear safety helmets.
5.5 After the protective cover is opened, do not allow people implanted with active or passive medical devices (such as pacemakers, cardiac defibrillators, insulin pumps, etc.) to approach the inside of the machine, lest the powerful permanent magnets inside the machine bring you life Danger.
5.6 Do not use sandpaper or organic solvents to scrub all warning signs. Damaged warning signs should be replaced in time.
5.7 In order to prevent the automatic cutter of the SMT placement machine from cutting the electrolytic capacitor to cause fire and the chip to damage the blade, the following two points must be done:
5.7.1 If you manually rotate the tape in the feeder forward, you must remove the components in the tape bag.
5.7.2 If the sealing tape of the SMT component is torn, the operator must remove all the components left on the tape.
5.8 The use of emergency stop switch. The emergency stop switch can only be pressed when encountering personal danger. For general problems, please press the black Stop button on the machine to handle it.
5.9 The computer on the device is only for this machine, and other uses are strictly prohibited. It is strictly prohibited to arbitrarily delete and modify the data files, system files, and batch files configured by the computer to avoid confusion in the computer system. Do not use any mobile storage devices to communicate with the computer without permission.
5.10 When overhauling the machine, shut down and cut off the power supply to prevent electric shock or short circuit.