Engraving method:
This method is the most direct. Use carbon paper to copy the designed copper foil pattern onto the copper foil surface of the copper clad laminate, and use a special engraving tool polished by a hacksaw blade to directly draw on the copper clad laminate along the edge of the copper foil pattern, cutting as far as possible. Then tear off the unnecessary copper foil other than the pattern, and then drill holes with a hand electric drill. The key to this method is: the strength of the depiction is sufficient; the removal of the excess copper foil should start from the edge of the board, and when the operation is good, it can be gradually removed in pieces. You can use small needle-nose pliers to complete this step. Some experimental versions of small circuits are suitable for making with this method.

2. Manual depiction:
It is to directly draw the printed graphics on the copper clad board with a pen, and then perform chemical etching and other steps. This method seems simple, but the actual operation is not easy! The current electronic components are small, the pin spacing is smaller (on the order of millimeters), the copper foil traces are also small, and the drawn lines are difficult to modify. Drawing such a board depends entirely on your writing skills. The experience is: the choice of "paint" and paintbrush are both crucial. I myself used red nail polish in a medical syringe to trace the PCB board. The effect is good, but the tip of the needle should be properly processed. Someone also introduced the use of lacquer tablets to dissolve in absolute alcohol and draw with a duckbill pen. The specific method is as follows :
One part of lacquer flakes (ie shellac, available in chemical raw material stores), dissolve in three parts of absolute alcohol, and stir appropriately. After all of them are dissolved, add a few drops of medical purple potion (gentian violet) to make it appear A certain color, after mixing evenly, can be used as a protective paint to paint PCB boards.
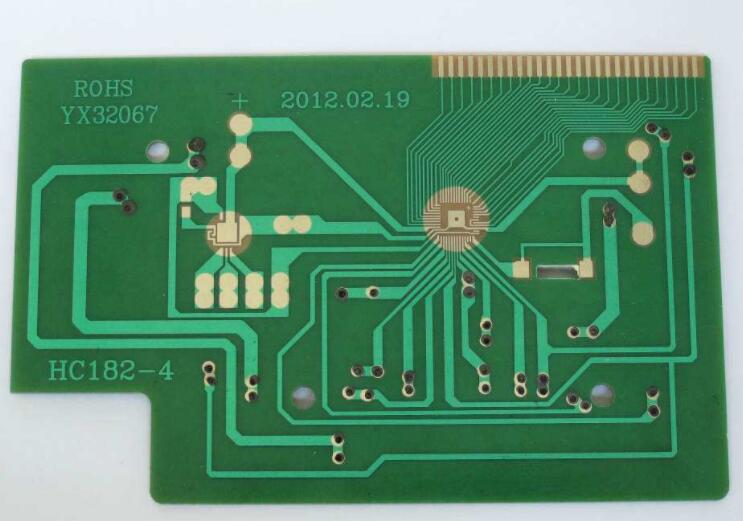
162T21M9-0.png
First polish the copper-clad board with fine sandpaper, and then use the duckbill pen (or the ink duckbill pen used to draw graphics on the compass) in the drawing instrument to draw. The duckbill pen has a nut to adjust the thickness of the stroke. It is adjustable and can be used to draw a very thin straight line with a ruler or a triangular ruler, and the drawn line is smooth and uniform, without edge jagged, giving people a smooth and fluent feeling; at the same time, it can also be used in the free space of the PCB board. Write the lines drawn by Chinese characters, English, pinyin or symbols. If it is infiltrated around, the concentration is too small, you can add a little paint; if you can’t draw the pen, it is too thick, and you need to drop a few drops of anhydrous alcohol . It doesn’t matter if you make a mistake, just use a small stick (matchstick) to make a small cotton swab, dipped in a little absolute alcohol, you can easily wipe it off, and then redraw it. Once the PCB boardmap is drawn, it can be corroded in the ferric chloride solution. After the PCB board is corroded, it is also very convenient to remove the paint. Use a cotton ball dipped in absolute alcohol to wipe off the protective paint, dry it for a while, and then apply pine perfume to use.
Because the alcohol evaporates quickly, the prepared protective paint should be sealed and stored in a small bottle (such as an ink bottle). Don't forget to cover the bottle cap after use. If the concentration becomes thicker the next time you use it, just add an appropriate amount Anhydrous alcohol is sufficient.
Three, texture method:
1. Pre-cut notation method
A "standard pre-cut symbol and tape" is available in the electronics store. Common specifications for pre-cut symbols are D373 (0D-2.79, ID-0.79), D266 (0D-2.00, ID-0.80), D237 (OD-3.50, ID-1.50), etc., it is best to buy paper-based materials (black), and plastic-based (red) materials should not be used as much as possible. The commonly used specifications of tape are 0.3, 0.9, 1.8, 2.3, 3.7, etc. The units are all millimeters. According to the circuit design layout, select the corresponding symbols and tapes and paste them on the copper foil surface of the copper clad plate. Use a softer hammer, such as smooth rubber, plastic, etc. to hit the sticker to make it fully adhere to the copper foil. Focus on the turning and overlapping of the line. In cold weather, it is best to use a heater to heat the surface to enhance the adhesion effect. After it is posted, the etching process can be carried out.
2. Self-adhesive paper mapping method (recommended)
Use Protel or PADS and other design software to draw the printed board diagram, use a needle printer to output to the sticker paper, paste the sticker paper on the cleaned copper-clad board, and use a paper cutter to cut out along the outline of the line, Tear off the part of the paper that needs to be corroded. Put it into the iron trichloride solution to corrode, clean, and dry it before putting it into use. This method is similar to the engraving method, but it saves a lot of effort than the engraving method, and can guarantee printing The beauty and precision of the wire!
Everyone knows from experience that the corrosion of ferric chloride solution is very slow. The author used dilute nitric acid to replace it. After doing this experiment, the corrosion speed is amazing. It can be done in about five minutes. The quality is no different from that of trichloro. It is recommended to DIY Try! But this method is more dangerous, remind the producer to pay attention, do not let any part of the body touch the corrosive liquid, otherwise the consequences are unimaginable! Remember! Remember!
Four, mimeograph method:
Put wax paper on the steel plate, engrave the circuit diagram on the wax paper 1:1 with a pen, and cut the circuit diagram engraved on the wax paper according to the size of the PCB board, and place the cut wax paper on the printed copper board. Take a small amount of paint and talcum powder to make a suitable thin and thick printing material, dip the printing material with a brush, and evenly apply it to wax paper, repeat it several times, and the circuit can be printed on the printed board. This kind of stereotype can be used repeatedly and is suitable for small batch production. Tip: Use the photoelectric transcription machine to automatically engrave the wax paper of 1:1 size according to the design drawings.
5. Hot-melt plastic film plate making method:
This method is collected from web articles and its feasibility has not been verified for reference.
1. Print the PCB diagram on the printer at a ratio of 1:1 on 80 grams of copy paper. Hand-drawing is also possible, but the bottom paper should be flat.
2. Find a fax machine, take out the fax paper from the machine, and replace it with hot-melt plastic film (it is said that it can be bought, and whoever has this product, please contact the webmaster). Put the circuit diagram into the entrance of the fax machine and use the copy button of the fax machine to copy the circuit diagram on the hot-melt plastic film. At this time, the "printed manuscript" of the printed PCB board is ready.
3. Use double-sided tape to smoothly paste the plastic film that has been drawn on the copper-clad board. Pay attention to be flat, not wrinkle, tape paper can not cover the melted part, otherwise it will affect the production effect of the circuit board.
4. Use a paint brush to evenly brush the paint on the plastic film. Note: Do not brush back and forth, only brush in one direction. Otherwise, the plastic film will wrinkle together and the lines on the copper plate will overlap. After the circuit diagrams have been brushed all over, carefully remove the plastic film. At this time, a printed circuit board is printed. After it dries, it can be corroded.
If you want to print more than one piece, you can make a wooden frame a little larger than the PCB board, and spread the silk screen on the wooden frame evenly.
The above is the PCB circuit board printing method, ipcb company also provides PCB manufacturers, PCB board manufacturing, etc.