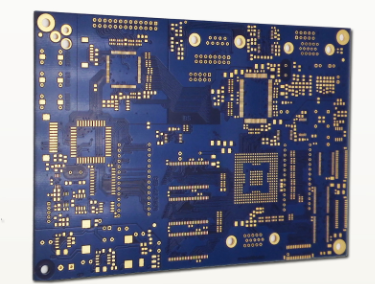
PCB manufacturer: mobile phone PCB wiring layout is risky and you need to be cautious when writing
1. What problems should be paid attention to in the PCB Layout of the mobile phone, and does the display part need to be wired?
layer1: device device
layer2: signal most of the address and data signal, part of the analog line (corresponding to 3 layers are ground)
layer3: GND part of the wiring (including the keyboard surface and the line that cannot be run on the 2nd layer), GND
Layer4: Strip line The baseband analog control line (txramp_rf, afc_rf), audio line, analog interface line between the baseband main chip and the main clock line that need to pass through the radio frequency
Layer5: GND GND
Layer6: Power supply layer VBAT, LDO_2V8_RF (150mA), VMEM (150mA), VEXT (150mA), VCORE (80mA), VABB (50mA), VSIM (20mA), VVCXO (10mA)
Layer7: The routing of the signal keyboard surface
Layer8: Device Device
two. Specific wiring requirements
1. General principles:
Wiring sequence: RF strip line and control line (at the antenna)-baseband radio frequency analog interface line (txramp_rf, afc_rf)-baseband analog line including audio line and clock line-analog baseband and digital baseband interface line-power line ――Digital line.

2. RF strip line and control line wiring requirements
The RFOG and RFOD networks are the fourth layer of strip lines with a line width of 3 mils. The upper and lower layers are covered with ground. The width of the strip lines is determined according to the actual thickness of the sheet and the length of the trace; because the strip lines need to be printed 2~7 holes, pay attention to the bottom layer to wrap around these holes, and the other layers should not be too close to these holes;
RX_GSM, RX_DCS, and RX_PCS networks are the top-level RF receiving signal lines with a line width of 8mil; RFIGN, RFIGP, RFIDN, RFIDP, RFIPN, and RFIPP networks are the top and second-level RF receiving signal lines, with a fixed layer line width of 8mil, and the second The layer line width is 4mil;
GSM_OUT, DCS_OUT, TX_GSM, TX_DCS/PCS network is the top level power amplifier output transmission signal line, the line width should be 12mil;
The antenna switch outputs to the test base and the top signal lines ANT_1, ANT_2, ANT_3, ANT of the antenna contact, and the line width is preferably 12 mils.
3. Analog line with radio frequency interface (going four layers)
The traces of the TXRAMP_RF and AFC_RF networks should be as thick as possible and surrounded by ground wires on both sides, and the line width should be 6mil;
QN_RF, QP_RF; IN_RF, IP_RF are two pairs of differential signal lines, please make the line length as equal as possible, and the spacing as much as possible, the width of the trace on the fourth layer is 6mil.
4. Important clock line (going four layers)
The 13MHz crystal U108 and quartz crystal G300 are noise sensitive circuits. Please minimize the signal routing below them.
The two terminals OSC32K_IN and OSC32K_OUT of the quartz crystal G300 should be routed in parallel, and the closer they are to D300, the better. Please note that the input and output lines of the 32K clock must not cross.
Please keep the traces of the SIN13M_RF, CLK13M_IN, CLK13M_T1, CLK13M_T2, CLK13M_IN_X, CLK13M_OUT network as short as possible, and surround them with ground wires on both sides. The two adjacent layers of the wiring must be grounded.
The clock is recommended to go 8mil
5. The following baseband analog lines (going four layers)
The following are 8 pairs of differential signal lines:
RECEIVER_P, RECEIVER_N; SPEAKER_P, SPEAKER_N; HS_EARR, HS_EARL; HS_EARR_T1, HS_EARL_T1; HS_MICP,
HS_MICN; MICP, MICN; USB_DP, USB_DN; USB_DP_T1, USB_DN_T1; USB_DP_X, USB_DN_X;
To avoid phase errors, the line lengths should be as equal as possible, and the spacing should be as equal as possible.
BATID is the AD sampling analog line, please use 6mil;
The four analog lines of TSCXP, TSCXM, TSCYP, and TSCYM also follow the differential signal line, please take 6mil.
6. AGND and GND distribution (?)
The AGND and GND networks are not connected together in the schematic diagram. After the layout is completed, they are connected with copper foil. The specific positions are as follows:
The bottom of D301 chip is distributed as analog ground AGND. The analog ground AGND and digital ground GND are connected near AGND (PIN G5) of D301.
MIDI analog ground MIDIGND is arranged at the bottom of D400 chip, MIDI analog ground MIDIGND and digital ground GND are connected near pin 16 of D400.
AGND is better than 50mil.
8. Important interface lines between digital baseband and peripheral devices
LCD_RESET, SIM_RST, CAMERA_RESET, MIDI_RST, NFLIP_DET, MIDI_IRQ, IRQ_CAMERA_IO, IRQ_CAMERA_IO_X, PENIRQ are reset signals and interrupt signals. Please take at least 6 mil lines.
POWE_ON/OFF go at least 6mil line.
7. Important interface lines between digital baseband and analog baseband:
VSDI, VSDO, VSFS, BSIFS, BSDI, BSDO, BSOFS, ASDI, ASFS, ASDO are high-speed data lines, the lines should be as short and wide as possible (above 6mil), and copper around the line;
BUZZER, ASM, ABB_INT, RESET, ABB_RESET are important signal lines, please take at least 6mil lines, short and copper around the lines;
9. power supply:
(1) Power signal with larger load current (going to six layers): The load current of the following power signals decreases in order, and it is better to divide them in the power layer: CHARGE_IN, VBAT, LDO_2V8_RF (150mA), VMEM (150mA), VEXT ( 150mA), VCORE(80mA), VABB(50mA), VSIM(20mA), VVCXO(10mA), VBAT and CHARGE_IN should be above 40 when wiring is required.
(2) Power signals with small load currents: VRTC and VMIC currents are small and can be placed on the signal layer.
(3) Charging circuit: VBAT and CHARGE_IN connected to XJ600, ISENSE power transmission line connected to VT301, the current is relatively large, the line should be wider, and 16mil is recommended.
(4)Keyboard backlight: KB_BACKLIGHT, KEYBL_T1 have 50mA current, R802~R809, VD801~VD808 flow current is 5mA, pay attention to wiring.
(5) Motor drive: The current flowing through the VIBRATOR and VIBRATOR_x networks is 100mA.
(6) LCD backlight drive: LCD_BL_CTRL, LCD_BL_CTRL_X network current flow is 60mA.
(7) Seven-color lamp backlight driver: LPG_GREEN, LPG_RED, LPG_BLUE, LPG_RED_FPC, LPG_GREEN_FPC, LPG_BLUE_FPC, LPG_RED_FPC_x, LPG_GREEN_FPC_x, LPG_BLUE_FPC_x The current flowing through the network is 5mA20mil, and it is recommended to flow through the above 6mil8mA. Keep away from analog signal traces and vias.
10. About EMI routing
(1) Before the output network of Z701, Z702, Z703 reaches the XJ700, please go to the inner layer, try to walk on the 2nd layer, and then punch via2~1 holes near the XJ700 pins to reach the TOP layer.
(2) The network LPG_RED_FPC_x, LPG_GREEN_FPC_x, LPG_BLUE_FPC_x, VIBRATOR_x, NCS_MAIN_LCD_x, NCS_SUB_LCD_x, ADD01_x from the RC filter, please go to the inner layer before reaching the XJ700, walk near the 3rd or 6th or 7th pin, and then go to the XJ500 pin Punch holes to reach the TOP layer.
(3) The keyboard matrix network cannot be routed on the eighth layer. Try to walk on the seventh layer. If the seventh layer can't go down, you can go to the third layer.
(4) As far as possible, the wiring of the bottom of the keyboard surface and the earphone part of the top should be routed as little as possible on the eighth layer. I hope that the keyboard surface will be able to cover a large area when it arrives.
(5) Pave the ground as large as possible under the SIM card XJ601 (on the surface) and use less signal lines.
11. The outer shielding strip of the component is 0.7mm, the spacing between the shielding strips is 0.3mm, and the distance between the pad and the shielding strip is 0.4mm. This position has been reserved.
12. There are 2 BGA devices in the baseband. Since the BGA conductive glue can only be glued from one direction, the radio frequency surface is used as the front side, and a 0.7mm glue position is uniformly reserved on the left side of the BGA.
13. The 20H principle. The power plane is retracted 20H from the ground plane.
14. Via size: 1~2,7~8 layers of vias are 0.3mm/0.1mm, and the remaining vias are 0.55mm/0.25mm.
15. There should be 1.5-2mm wide grounding strips on the edge of the top PCB and punch holes.
16. After the copper is applied, connect the ground of each layer with via holes.
17. Pay attention to avoid parallel routing of adjacent layers, especially for the fourth layer, the third layer should be especially careful.