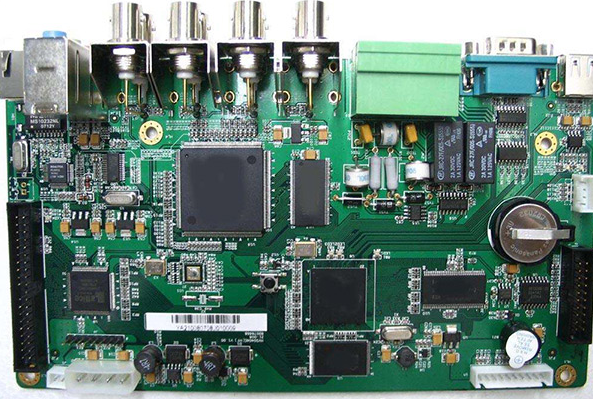
Some problems should be paid attention to during hardware debugging. For example, before hardware debugging, the circuit board should be carefully inspected to observe whether there is a short circuit or open circuit (because the DSP PCB board wiring is generally dense and thin, the probability of this occurrence is relatively high). After power-on, whether some chips are particularly hot in your hands. If you find that some chips are hot, you need to immediately power off and recheck the circuit. After troubleshooting, check whether the crystal is oscillating and whether the reset is correct and reliable. Then use an oscilloscope to check whether the signals of the CLK-OUT1 and CLK-OUT2 pins of the DSP are normal. If they are normal, it indicates that the DSP itself is basically working normally.
Use simulation software to troubleshoot hardware failures
After completing the inspection of the circuit board, the program can be debugged through the simulation software. Since the program code is downloaded to the off-chip program memory in the target system during simulation, some hardware faults can be easily checked through the simulation software. After power-on, if the simulation software debugging window cannot be called into the program, there are two possibilities:
1. There is an open circuit or short circuit on the pins of the DSP chip.
2. The DSP chip is damaged.
If it is the first time to use the simulation software to debug the program, the experiment board should be powered off at this time, and the welding condition of each pin of the DSP chip should be carefully checked. If the software debugging window has been loaded into the program correctly, the DSP chip may be damaged. At this point, you can further determine whether the DSP chip is damaged by detecting the entire board impedance of the experiment board. If the impedance of the whole board drops sharply, the power supply line that supplies power to the DSP chip can be cut to check the resistance of the DSP chip.
If the software debugging window can be loaded into the program, but the loaded program is partially wrong, for example, the code for operating the off-chip program memory or data memory becomes .word xxxx, at this time, the off-chip program memory or data memory may be faulty. The memory should be carefully checked for short circuits or virtual soldering, if not, it should be further judged whether the memory is damaged.
Ensure the stability and reliability of the power supply
Before debugging the DSP hardware system, make sure that the power supply for the experiment board has good constant voltage and constant current characteristics. It is especially important to note that the input voltage of DSP should be kept at 5.0V±0.05V. If the voltage is too low, an error message will appear when writing programs to Flash through the JTAG interface; if the voltage is too high, the DSP chip will be damaged.