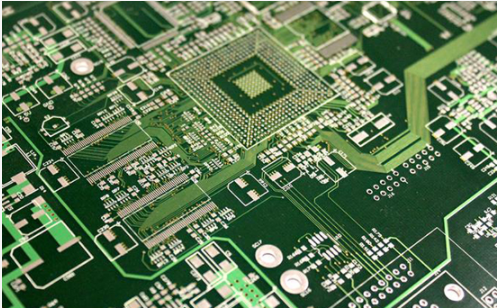
Proofing process of pcb board manufacturers
The purpose ofобразец pcbЭто изготовление небольшого количества образцов до серийного производства для проверки качества продукции, to a certain extent, избежать риска крупномасштабного производства в будущем. So, what is the proofing process of pcb board manufacturers?
The first step: check the information
Before production, Мы проверим информацию, предоставляемую клиентом, including relevant data such as the size of the board, технологический требование, and product quantity, после достижения соглашения с клиентом будет производиться следующее производство.
Step 2: Cutting
According to the board materials given by the customer, cut small pieces of производственная плитав Совете директоров. Specific operation: large sheet cutting board according to MI requirements curium board beer fillet / край - всплывающее поле.

Step 3: Drilling
Drill the required hole in the corresponding position of the PCB board. плитка - бронза - пиво / edging plate out.
Step 4: Immerse the copper
A thin layer of copper is chemically deposited on the insulating holes. Specific operation: rough grinding hanging board automatic copper sinking line lower board dip 1% dilute H2SO4 thickened copper.
Step 5: Graphics transfer
Transfer the image on the production film to the board. Специальные операции: пеньковая пластина - мембрана - статическое наведение - экспонирование - статическое печатание - контроль.
Step 6: Graphic plating
Electroplating a copper layer with the required thickness and a gold-nickel or tin layer with the required thickness on the exposed copper skin or hole wall of the circuit pattern. работа: верхняя плита - обезжиривание - промывка дважды - травление - травление - травление - травление - травление - травление - травление - травление - травление - травление - омеднение - лужение - лужение - мойка - нижняя плита.
Step 7: Unwind the film
The anti-electroplating covering film layer is removed with NaOH solution, and the non-circuit copper layer is exposed.
Step 8: Etching
Remove the non-line parts with chemical reagent copper.
Step 9: Green Oil
The graphics of the green film are transferred to the board, олово на цепи защиты от сварки деталей.
Step 10: Characters
Recognizable characters are printed on the PCB board. Конкретные действия: после завершения зеленого масла - охлаждение и размещение - Настройка экрана - печать символа - задний кюри.
Step 11: gold-plated fingers
A nickel/нанести на палец штепселя золотое покрытие требуемой толщины, сделать его более твердым и износостойким.
Step 12: Forming
The shape required by the customer is punched out with a die or a CNC gong machine.
Step 13: Test
It is not easy to find functional defects caused by open circuit, короткое замыкание, etc. пройти визуальный осмотр, and can be tested by flying probe tester.
выше процесс отбора продуктазавод плит pcb, I hope it will help you!