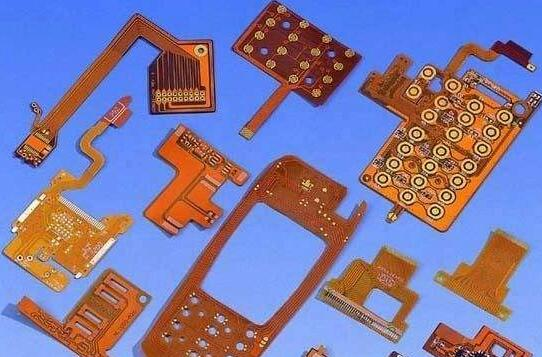
PCB process General steps for drawing PCB
при каждом проектировании PCB необходимо следовать следующему порядку, чтобы сэкономить время и добиться максимальной эффективности.
выбрать имя SCH, PCB и других файлов (на английском языке, цифры) и добавить расширение.
2. Schematic
First design the size of the deleted grid, размер чертежа, select the metric system, Добавить модуль библиотеки. Draw the diagrams, компонент, and lines according to the circuit function modules so that people can easily see the principles. Постарайся быть стройным и красивым. Do not run wires inside the components. Будьте осторожны, чтобы провода между, because there is no electrical connection. Лучше не соединять сразу два компонента. After drawing, you can automatically число (except for special requirements), and then add the corresponding nominal value. лучше изменить номинал на красный и жирный, so that it can be distinguished from the label. открыть. Лучше поставить метки и метки в нужное место. В общем, the left side is the label and the right side is the nominal value, или на вкладке, and the lower side has no nominal value. обычное сохранение в процессе! First, убедиться в правильности принципиальных схем, perform ERC check without error, затем распечатать для проверки. Secondly, лучше уяснить принцип схемы, for high and low voltage; large and small теперьs; analog and digital; large and small signals; large and small power blocks, Для удобства последующего размещения.
3. Make PCB component library
For the production of component packages that are not available in the standard library and your own common library, рисовать планшет, paying attention to the size, размер паяльного диска, location, number, inner hole size, сторона, (printing method and size). это имя по - английски, which is easy to read. It is better to have the corresponding size so that you can find it when you use it next time (you can save it in the form of a table corresponding to the name and the corresponding size). рабочий диод, transistors should pay attention to the labeling method. лучше всего иметь в своем хранилище часто используемые диоды, such as 9011-9018, 1815, D880, сорт. For light-emitting diodes, светодиод, RAD0.1, RB.1/.2, как и другие часто используемые пакеты в стандартной библиотеке, they should all be in their own library. You should be familiar with the sealed forms of commonly used components (resistors, конденсатор, diodes, and triodes).

4. Generate the network table
Add package, save, схема проверки ERC, generate component list check. Создать список сетей.
5. Build the PCB
Choose the metric system, capture and visible grid size, design the outer frame as required (guide or draw by yourself), and then place the position and size of the fixed hole (3.винт 0 мм может использовать 3 шт.5mm inner hole pads, 2.5mm You can use the inner hole of 3), Заменить подушку на край, the size of the hole, и положение фиксированное. Добавить требуемую библиотеку.
6. Layout
Call the netlist, блок загрузки, modify the size of some pads, Правило подключения, you can change the size, толщина, and hide the nominal value of the label. затем сначала установите детали, требующие особого положения, и установите их. Then according to the layout of the functional module, ((вы можете выбрать режим PCB, используя SCH)), не использовать X, Y to flip the components, Но вращаться, or the L key, (because some components cannot be flipped, Such as integrated blocks, эстафета, сорт.). For a functional module, ставить на первое место центральный элемент или большую часть, and then put the small component next to it. (For example, put the integrated block first, затем соединяйте компонент непосредственно с двумя зажимами интегрального блока, затем соединяйте компонент с выводом интегрального блока, И как можно больше Объединять схожие компоненты, and it is more beautiful to consider the subsequent wiring Convenience). Конечно, some special relational components are put first, например, некоторые фильтровые конденсаторы и кварцевые генераторы, which need to be placed close to some components first. Кроме того, существуют и другие факторы, которые могут повлиять на общие соображения и которые еще далеки от них. The high and low voltage modules should be spaced at least 6.интервал 4 мм. Pay attention to the position of the heat sink, сцепление, and fixing frame. FILL может использоваться в некоторых недоступных местах. Also consider heat dissipation, термочувствительный элемент. Resistor and diode placement methods: divided into two types: horizontal placement and vertical placement.
(1) Horizontal placement: When the number of circuit components is small and the size of the плата цепи is large, обычно лучше использовать горизонтальное размещение; резистор ниже 1/4W, the distance between the two pads is general Take 4/10 дюймов, when the 1/сглаживание резистора 2W, the distance between the two pads is generally 5/10 дюймов при нормальном диоде, 1N400X series rectifier tubes, Принимать 3 таблетки/10 inches; 1N540X series rectifier tubes, Общие потребности 4 - 5 минут/10 inches.
(2) Vertical installation: When there are a large number of circuit components and the size of the плата цепи is not large, обычный вертикальный монтаж, расстояние между двумя прокладками обычно составляет от 1 до 2/10 inches in the vertical installation.
7. Wiring
First set the content in the rules, VCC, GND and other high current lines can be set wide points (0.5 мм - 1.5mm), обычно 1mm может пропускать ток 1A. For large voltage line spacing, Ты можешь сделать больше, generally 1mm is 1000V. Настройка после завершения, first route some important lines such as VCC and GND. обратите внимание на различия между модулями. It is best to add some lines to a single panel. Добавить лунку, not necessarily horizontal and vertical. В общем, there is no wiring between the pads of the integrated block. Wide lines with high current can be drawn on the solder layer for tinning on the back; the wiring uses a 45-degree angle
8. Manually modify the line
Modify the width, corners of some lines, fill the tear ground or wrap the land (single-sided board must be done), покрывать медью, and deal with the ground wire.
9. Check
DRC, затем можно напечатать EMC и другие проверки для проверки и сравнения сетевых таблиц. Check the component list.
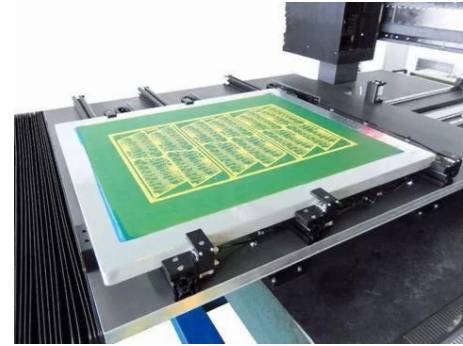
10.Plus (обычно изготовленные из шёлковой печати)
11. The adjustment of the potentiometer is generally clockwise to increase (voltage, current, etc.)
высокая частота (> 20 МГц) обычно заземляется в нескольких точках 10 МГц или < 1 МГц приземление в одном месте. В то же время, это гибридное приземление.
не все оборудование по мере необходимости должно быть упаковано в соответствии со стандартом, может быть сварка встык или перпендикулярной.
14. When wiring the печатная плата, the плата цепи manufacturer should first determine the position of the components on the board, and then lay out the ground wire and the power wire. при постановке высокоскоростных сигналов, it is best to consider low-скорость signal lines. группировать детали по напряжению питания, digital simulation, speed, current size, etc. Under safe conditions, линия электропитания должна быть как можно ближе к земле. Reducing the loop area of differential radiation also helps to reduce the crosstalk of the circuit. когда нужно, medium-speed, логическая схема на ЭВМ плата цепи, the high-speed logic circuit should be placed close to the edge connector, низкоскоростная логика и память должны быть удалены от соединителя. Это благоприятствует связи с общим сопротивлением, the reduction of radiation and crosstalk. приземление - самое важное. нужно почти одновременно иметь резервную копию, или некоторые шаги легко разрушаются, файл повреждён при необходимости резервного копирования.