This application note aims to provide design layout guidance for the structure and layout of various PCBs (printed circuit boards) (such as FR4, flexible PCB or ITO panels) used in the design of S-TouchTM capacitive touch sensing.
Among the PCB substrates currently available on the market, FR4 is the most commonly used one. FR4 is a glass fiber reinforced epoxy resin laminate, and the PCB can be single-layer or multi-layer PCB.

When the size of the touch module is limited, it is not always feasible to use a single-layer PCB, and usually a four-layer or two-layer PCB is used. We will introduce PCB layout guidelines using the most commonly used two-layer PCB as an example.
PCB design and layout
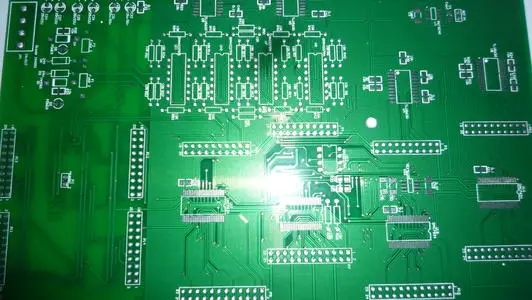
In a two-layer PCB, the S-TouchTM touch controller and other components are arranged on the bottom layer of the PCB board, and the sensor electrodes are arranged on the top layer of the PCB.
The tuning matching capacitor required for each sensor channel can be directly arranged on the bottom layer of the sensor electrode. It should be pointed out that the S-TouchTM touch controller is arranged on the bottom layer, and it should be ensured that no sensor electrodes are arranged on the corresponding top layer. The blank areas on the top and bottom layers can be filled with mesh grounded copper foil.
Design rules
The first floor (top layer)
. The sensor electrode is located on the top layer of the PCB (the upper end of the PCB is fixed with the overlay board). To increase sensitivity, it is recommended to use a sensing electrode with a size of 10 x 10 mm. A smaller size sensing electrode can be used, but the sensitivity will be reduced. At the same time, it is recommended that the size of the sensing electrode does not exceed 15 x 15 mm. If the sensing electrode exceeds this size, it will not only reduce the sensitivity, but also increase the susceptibility to noise.
. The blank area can be filled with grounded copper foil (the trace width is 6 mils, and the grid size is 30 mils).
. The top layer can be used to lay common signal traces (not including sensor signal traces). The sensor signal traces should be laid on the bottom layer as much as possible.
. The distance between the sensing electrode and the grounding copper foil should be at least 0.75 mm.
2nd floor (bottom)
. S-TouchTM controller and other passive components should be designed and laid out on the bottom layer.
. The sensor signal trace will be laid out on the bottom layer. Do not route the sensor signal traces of one channel under the sensing electrodes of other sensing channels.
. The blank area can be filled with grounded copper foil (the trace width is 6 mils, and the grid size is 30 mils).
. The distance between the sensor signal trace and the grounding copper foil should be at least twice the width of the sensor signal trace.
. To reduce crosstalk, the distance between the two sensing electrodes/sensing signal traces should be increased as much as possible. Where possible, add grounded copper foil between the two sensing electrodes/sensing signal traces.
. The length of the sensor signal trace does not need to be exactly the same length. Because of the use of matching tuning capacitors, the input capacitance between the two channels can be balanced. However, when the PCB space permits, it is best to use sensor signal traces of equal length (the size of the sensor electrodes is also uniform). In this way, in order to adjust the sensor capacitive reactance values of all sensing channels to within the dynamic range of the controller sensing, only one standard reference capacitor needs to be set, which simplifies the design difficulty.
. Any clock, data or periodic signal traces should not be laid parallel to and adjacent to the sensor signal traces. These signal lines should be as perpendicular as possible to the signal traces of the sensor, or laid out in other areas of the PCB.
. If the clock, data or any periodic signal traces do need to be routed in parallel with the signal traces of the sensor, they should be laid out on different layers and cannot overlap, and the length of the parallel part of the signal traces should be shortened as much as possible.
grounding copper foil
In the previous introduction to the two-layer FR4 PCB, the grounded copper foil was used to fill the blank cross-sectional area of the PCB. The grounding copper foil can help the touch module to shield the external noise source, and can also stabilize the inherent capacitance of the sensor circuit.
However, there are several issues that need to be paid attention to in advance when using grounded copper foil. This is because the grounded copper foil increases the inherent capacitance of the sensor and also increases the possibility of false detection due to water droplets.
Grounding Copper Foil Design Guide:
. It is recommended to use mesh grounding copper foil instead of solid grounding copper foil. It is recommended to use a 20% mesh ground copper foil (6 mil trace width and 30 mil mesh size). The angle of the grounding copper foil should be set to 45°.
. The distance between the sensor and the grounded copper foil should be at least 0.5 mm, and 0.75 mm is recommended.
. The gap between the sensor signal trace and the grounding copper foil should be at least twice the width of the trace.
. For a four-layer PCB, if the sensor signal trace on the third layer is greater than 10 cm, in order to minimize the capacitive load of the long trace, it is recommended not to lay grounded copper foil on the bottom layer.
. If some conductive materials are used for the cladding board, it is recommended not to lay grounded copper foil on the top layer.
. If the capacitive sensing system needs to work in a humid environment, it is recommended not to lay grounded copper foil on the top layer.
Sensor basic function description and guide
Capacitance sensor electrode refers to a conductive electrode plate used to measure finger capacitance. It is connected to the input terminal of the sensing channel of the S-TouchTM controller. Sensor electrodes can be made into various geometric shapes and sizes to have different functions and applications.
Touch button
The basic function of the touch button is to detect whether there is a finger touching it. The S-TouchTM controller can measure the capacitance of the sensing electrode of the touch button. If the finger is relatively close to the touch button, when the measured capacitance change exceeds a preset threshold, the occurrence of a finger touch will be detected.
The touch button can be designed in various shapes, such as square, circle, triangle or other shapes. If the size of the PCB is limited, the button shape should be designed to maximize the use of space in order to provide the best sensitivity.
For applications covered with a 2-3 mm acrylic plastic shell, it is recommended to use a square sensing electrode with a minimum size of 10 x 10 mm. It is recommended that the maximum size not exceed 15 x 15 mm. If it exceeds this size, not only the sensitivity cannot be improved, but also the noise susceptibility is increased.
Touch the slider
The basic function of the touch slider is to detect the sliding position of the finger in one-dimensional direction.
One of the typical applications of the touch slider is for volume control. Two methods can be used to implement the touch slider: touch state slider and ratio meter slider.
The square touch buttons are arranged closely together in order, which can be designed as a touch state sliding bar.
When it is detected that a certain sensor channel is turned on, the position of the finger on the touch slider can be determined. In the above example, 5 sensors are used to detect 9 locations. If the S1 and S2 channels are on at the same time, it means that the position of the finger is at position 2.
For applications covered with a 2-3 mm acrylic plastic shell, it is recommended to use a sensor electrode with a minimum size of 10 x 10 mm. The recommended gap value between the slider sensors is 0.75 mm. The gap between two adjacent sensing electrodes should not exceed 1 mm. This is to ensure that when the finger is exactly in the gap, the two sensor channels can be opened at the same time.
The advantage of the touch state slider is its simple design and high stability in a noisy environment. However, if a large number of locations are required, this method cannot be implemented due to the need for too many sensor channels.
Another method is to use the proportional metering slider. This method is not implemented by detecting the touch state on each sensor channel, but by determining the position of the finger based on the exact change in capacitance measured by each sensor channel. When the exact capacitance change of each sensing channel is measured, the exact position of the finger is determined by calculating the ratio.
A finger touch in the above position will cause the capacitance of the three sensing channel electrodes to increase. Due to the difference in the area covered by the finger, the capacitance value added by each sensor is also different. Then, by processing the raw capacitance data of the sensor, the absolute position of the finger on the slider can be obtained.
touch spinner
Like the slide bar, the touch rotator is also implemented based on the touch state and ratio measurement method.
The spinner applying the touch state method determines the position of the finger by checking the state of each sensing channel. The rotator, which uses the proportional measurement method, determines the position of the finger by measuring the exact capacitance of each sensing channel increased due to the touch of the finger. When a finger rolls on the spinner, it causes the capacitance of several sensing channels to increase. Then, by calculating the capacitance value added by these sensing channels, the exact position of the finger touch can be calculated.
The stability of the touch rotator for finger touch detection depends on the required resolution and the number of sensing channels. For a high-resolution touch rotator, more sensing channels may need to be used instead of only three sensing channels.
Other considerations
Following these basic design guidelines for PCB design and layout can make capacitive sensing applications more reliable. In PCB design, other important factors should be considered, including:
. There is no floating plate/polar plate on the PCB board. The blank area of the PCB can be filled with grounded copper foil or left blank.
. The PCB should be designed such that the required reference capacitance value is less than 20 pF (the reference capacitance value is determined during hardware adjustment), and the inherent capacitance of each channel should be less than 10 pF. If it is greater than this value, you need to modify some basic layouts, such as reducing the density of the grounding copper foil, expanding the distance between the sensing input trace/electrode and the grounding copper foil, reducing the width of the sensor signal trace, or even removing the grounding copper foil. If the maximum value of the sensing input capacitance exceeds 10 pF, you need to use a tuning capacitor for matching settings.
. Try to control the difference in the inherent capacitance between each sensing channel within 10 pF (this difference can be measured during hardware adjustment). If it exceeds 10 pF, it is necessary to reduce the mismatch between the trace length and the sensor electrode size to re-layout in order to minimize the difference.
. Install series resistors in the I2C SDA and SCL lines in order to filter the noise interference caused by the wiring harness connecting the motherboard and the touch module, or interference from power noise that may cause I2C signal distortion.