When using a PCB prototype, it is necessary to assemble the prototype PCB into a prototype PCBA board. The main purpose is to provide a practical and flexible method for rapid production of circuits. Customized circuits can be constructed and evaluated by inserting and soldering components into pre-drilled or grid patterned pads.

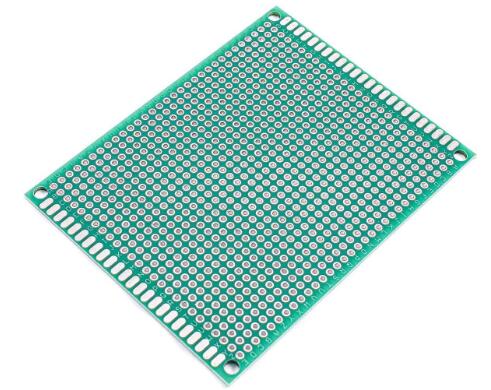
PCB prototype
Bare board: A foundation board that provides a substrate for installing components and establishing wire connections.
Copper wire: A thin copper strip that passes through a circuit board and serves as a conductor for transmitting electrical signals between components.
Component: Discrete electronic components that make up a circuit, such as capacitors, resistors, integrated circuits, and other electronic components.
Power and ground planes: Specific positions on the PCB prototype board are dedicated to the power and ground connections of various components, ensuring stable and reliable electrical pathways.
How to use a PCB prototype board?
1. Planning and Design:First, use paper or computer-aided design software to create a layout for circuit design. Carefully consider component placement and wiring to minimize interference and crosstalk.
2. Component acquisition:Collect all components required for the circuit. Carefully check their values, ratings, and quantities to ensure accuracy.
3. PCB board preparation:After cleaning, check if there are any errors or damage marks on the surface of the PCB board. Use a small file or sandpaper to smooth out rough edges. Place each component on the board and plan its position.
4. Component welding:Weld the components one by one onto the prototype circuit board. Use a soldering iron to simultaneously heat the component leads and solder pads to promote appropriate solder flow and establish safe electrical connections.
5. Testing and troubleshooting:Once all components have been welded, use a multimeter to test continuity, verify voltage levels, and detect any potential short circuits. Carefully inspect the solder joints and component values to identify and resolve any issues.
Types of Prototype Boards
1.Breakboard: Breakboard is a widely used and universal prototype board. Its characteristic is a grid of interconnected holes arranged in rows and columns, allowing for convenient insertion and connection of through-hole components. Breadboards are an ideal choice for rapid prototyping and experimentation as they do not require welding.
2.Stripboard: This is a prototype board with parallel copper rails arranged in a grid shape. These tracks serve as conductive connections between components. When more permanent circuit solutions are needed, strip boards are usually used because components can be directly soldered onto copper tracks. They provide portable and reliable options for small and medium-sized circuits.
3.Perfboard: characterized by a grid hole that allows for component placement and welding needs. Unlike ribbon boards, they do not have pre-arranged copper tracks, providing greater flexibility in circuit design. However, successful implementation requires careful planning and welding skills.
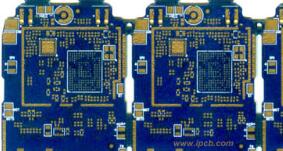
4.Printed Circuit Board: PCB board is the most professional and durable circuit choice. PCBA uses specialized software for extensive design and manufacturing. PCB prototype boards provide precise design, improved performance, and enhanced reliability. They are very suitable for complex circuits and large-scale production, although they require advanced tools and professional knowledge to manufacture.
Benefits of Using Prototype Boards
1.Rapid: Prototype design allows for rapid circuit construction and testing without the need for soldering. This makes the iterative and experimental process faster during the design phase.
2.Flexibility: Prototype boards provide high flexibility in circuit design. The convenience of adding, removing, and rearranging components simplifies the process of testing different settings and troubleshooting potential errors.
3.Cost-effectiveness: By eliminating the need for expensive customized production of small-scale PCB assembly, it helps to save costs. This makes electronic prototype design more easily accepted by a wider audience.
4.Reusability: Prototype boards can be used for multiple projects. Components can be disconnected and reinserted, allowing circuit boards to be used for different circuit designs.
5.Overall circuit performance: Conduct PCB prototype assembly to form a complete PCBA board, and through a series of testing items such as functional testing, check whether these boards have the expected functions to avoid failures in subsequent batch projects.
The PCB prototype board enables us to accurately test the usability, material properties, functionality, and performance of the design, and ultimately test the feasibility of the product.