In the manufacturing of the PCB design itself, as well as the semi-automatic plug-in and ICT testing processes in the assembly, it is necessary for the PCB to provide two to three positioning holes in the corners.
3. Reasonable use of puzzles to improve production efficiency and flexibility
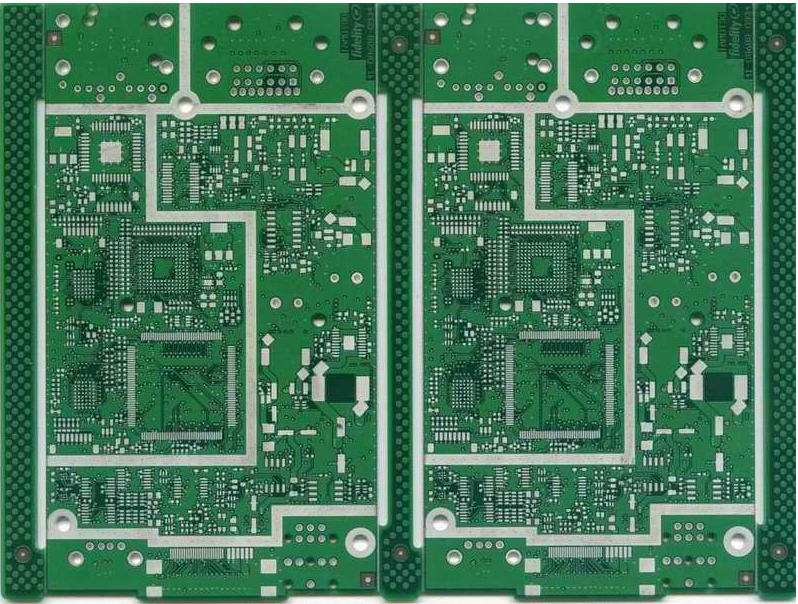
There are many restrictions when assembling PCBs with small dimensions or irregular shapes. Therefore, the method of splicing several small PCBs into PCBs of suitable size is generally used for assembly.
Generally, PCBs with a single side size less than 150mm can be considered to be joined together. Through two-piece, three-piece, four-piece, etc., the size of the large PCB can be assembled to the appropriate processing range, usually 150mm~250mm wide and 250mm~350mm long The PCB is a more suitable size in automated assembly.
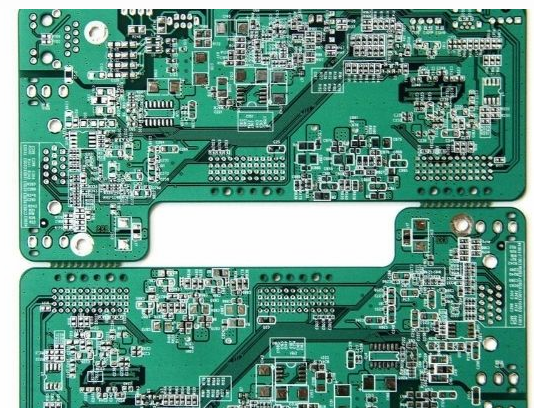
Another way of splicing is to assemble the PCB with SMD on both sides into a large board. This kind of splicing is commonly known as Yin-Yang splicing. It is generally for the purpose of saving the cost of the network board, that is, through this Jigsaw puzzles originally required two screens, but now only one screen is needed.
In addition, when the technicians compile the operation program of the placement machine, the PCB programming efficiency of using Yin and Yang spelling is also higher.
The connection between the sub-boards can be double-sided engraved V-slots, long slots and round holes when joining the board, but the design must consider making the separation line as possible as possible to be in a straight line to facilitate the final split. At the same time, it should be considered that the separation edge should not be too close to the PCB trace, so that the PCB is easily damaged when the board is split.
There is also a very economical jigsaw, which does not refer to the PCB jigsaw, but the mesh pattern of the stencil.
With the application of fully automatic solder paste printers, the current more advanced printers have allowed the opening of multi-sided PCB mesh patterns on a stencil with a size of 790*790mm, which can be used to print multiple products on a single stencil., Is a very cost-saving approach, especially suitable for manufacturers with small batches and multiple varieties of product characteristics.
4. Design considerations for testability
The testability design of SMT is mainly aimed at the current ICT equipment situation. The test problems of later product manufacturing are taken into consideration during the design of the circuit and the surface-mounted printed circuit board SMB. To improve the design of testability, two aspects of process design and electrical design should be considered.
Process design requirements

Positioning accuracy, substrate manufacturing procedures, substrate size, and probe type are all factors that affect the reliability of detection.
Precise positioning holes. Set precise positioning holes on the substrate. The error of the positioning holes should be within ±0.05mm. At least two positioning holes should be set, and the distance is better. Use non-metallized positioning holes to reduce the thickening of the solder plating and fail to meet the tolerance requirements. If the substrate is manufactured as a whole piece and then tested separately, the positioning holes must be provided on the main board and each individual substrate.
The diameter of the test point is not less than 0.4mm, and the distance between adjacent test points is preferably above 2.54mm, not less than 1.27mm.
Do not place components with a height exceeding *mm on the test surface. Excessive components will cause poor contact between the on-line test fixture probe and the test point.
It is best to place the test point 1.0mm away from the component to avoid impact damage to the probe and component. There should be no components or test points within 3.2mm around the ring of the positioning hole.
The test point cannot be set within 5mm of the edge of the PCB. The 5mm space is used to ensure the clamping of the fixture. Usually the same process side is required in conveyor belt production equipment and SMT equipment.
All detection points are best to be tinned or to use soft, easily penetrated, and non-oxidized metal conductors to ensure reliable contact and prolong the service life of the probe.
The test point cannot be covered by solder resist or text ink, otherwise the contact area of the test point will be reduced and the reliability of the test will be reduced.
Electrical design requirements
It is required to lead the SMC/SMD test points of the component surface to the soldering surface through the via hole as much as possible, and the diameter of the via hole should be greater than 1mm. In this way, the online test can be tested with a single-sided needle bed, thereby reducing the cost of online testing.
Each electrical node must have a test point, and each IC must have POWER and GROUND test points, which are as close to this component as possible, preferably within 2.54mm from the IC.
When setting test points on the traces of the circuit, the width can be enlarged to 40 mils.
The test points are evenly distributed on the printed board. If the probes are concentrated in a certain area, the higher pressure will deform the board to be tested or the needle bed, which will further cause some probes to not touch the test point.
The power supply circuit on the circuit board should be set with test break points in different areas, so that when the power supply decoupling capacitor or other components on the circuit board are short-circuited to the power supply, it is quicker and more accurate to find the fault point. When designing the breakpoint, consider restoring the power carrying capacity after the test breakpoint.
Use extension wires to set test pads near the component leads or use via pads to test nodes. Test nodes are strictly prohibited to be selected on the solder joints of the components. This test may cause the virtual solder joints to be squeezed under the pressure of the probe. Ideal location, so that the false welding fault is covered, the so-called "fault masking effect" occurs.
Due to the sway of the probe caused by the positioning error, the probe may directly act on the endpoint or pin of the component and cause damage to the component.
The above is the manufacturability of PCB layout and design, I hope to help everyone.