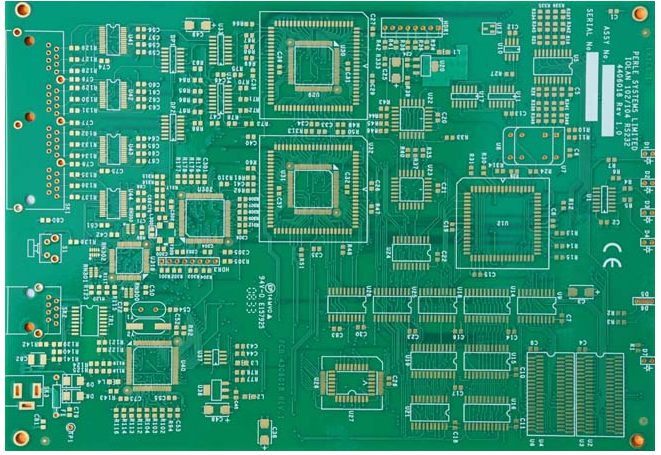
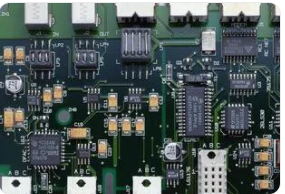
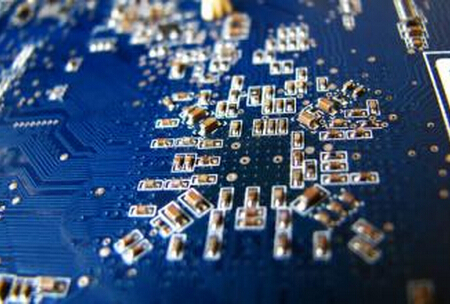
1. Via design in high-speed PCB
In high-speed PCB design, multi-layer PCBs are often required, and vias are an important factor in multi-layer PCB design. The via hole in the PCB is mainly composed of three parts: the hole, the pad area around the hole, and the POWER layer isolation area. Next, let's understand the problems and design requirements of vias in high-speed PCBs.
The impact of vias in high-speed PCBs
In the high-speed PCB multilayer board, the signal transmission from one layer of interconnection line to another layer of interconnection line needs to be connected through vias. When the frequency is lower than 1 GHz, vias can play a good role in connection., Its parasitic capacitance and inductance can be ignored. When the frequency is higher than 1 GHz, the parasitic effect of the via cannot be ignored on the signal integrity. At this time, the via appears as a discontinuous impedance breakpoint on the transmission path, which will cause signal reflection, delay, and attenuation. And other signal integrity issues.
When the signal is transmitted to another layer through the via hole, the reference layer of the signal line also serves as the return path of the via hole signal, and the return current will flow between the reference layers through capacitive coupling, causing problems such as ground bounce.

Type of via
Vias are generally divided into three categories: through holes, blind holes and buried holes.
Blind hole: It is located on the top and bottom surfaces of the printed circuit board with a certain depth and is used for the connection of the surface circuit and the inner circuit below. The depth of the hole and the diameter of the hole usually do not exceed a certain ratio.
Buried hole: refers to the connection hole located in the inner layer of the printed circuit board, which does not extend to the surface of the circuit board.
Through hole: This kind of hole passes through the entire circuit board and can be used for internal interconnection or as a component installation positioning hole. Because the through hole is easier to realize in the process, the cost is lower, so the general printed circuit board is used
Via design in high-speed PCB
In high-speed PCB design, seemingly simple vias often bring great negative effects to circuit design. In order to reduce the adverse effects caused by the parasitic effects of the vias, the following can be achieved in the design:
(1) Choose a reasonable via size. For multi-layer general-density PCB design, it is better to use 0.25mm/0.51mm/0.91mm (drilled holes/pads/POWER isolation area) vias; for some high-density PCBs, 0.20mm/0.46 can also be used For vias of mm/0.86mm, you can also try non-through vias; for power or ground vias, you can consider using a larger size to reduce impedance;
(2) The larger the POWER isolation area, the better, considering the via density on the PCB, generally D1=D2+0.41;
(3) The signal traces on the PCB should not be changed as much as possible, that is to say, the vias should be reduced as much as possible;
(4) The use of a thinner PCB is conducive to reducing the two parasitic parameters of the via;
(5) The power and ground pins should be close to the vias. The shorter the lead between the vias and the pins, the better, because they will increase the inductance. At the same time, the power and ground leads should be as thick as possible to reduce impedance;
(6) Place some grounding vias near the vias of the signal layer to provide a short-distance loop for the signal.
In addition, the length of the via is also one of the main factors affecting the inductance of the via. For the via holes used for the top and bottom layers, the via length is equal to the PCB thickness. Due to the continuous increase in the number of PCB layers, the PCB thickness often reaches more than 5 mm.
However, in high-speed PCB design, in order to reduce the problems caused by vias, the length of vias is generally controlled within 2.0mm. For vias with a length greater than 2.0 mm, the continuity of via impedance can be improved to a certain extent by increasing the aperture of the via. When the via length is 1.0 mm or less, the best via hole diameter is 0.20 mm ~ 0.30 mm.
Second, the back drilling process in PCB production
1. What PCB back drill?
Back drilling is actually a special kind of controlled depth drilling. In the production of multi-layer boards, such as the production of 12-layer boards, we need to connect the first layer to the 9th layer. Usually we drill through holes (one-time drilling), And then Chen Tong. In this way, the first floor is directly connected to the 12th floor. In fact, we only need the first floor to be connected to the 9th floor. Since the 10th to the 12th floor are not connected by wires, they are like a pillar.
This column affects the signal path, which can cause signal integrity problems in the communication signal. So this extra pillar (called STUB in the industry) was drilled out from the reverse side (secondary drilling). So it is called back drill, but it is generally not as clean as the drill, because the subsequent process will electrolyze a little copper, and the drill tip itself is also sharp. Therefore, the PCB manufacturer will leave a small point. The length of this left STUB is called the B value, which is generally in the range of 50-150UM.
2. What are the advantages of back drilling?
1) Reduce noise interference;
2) Improve signal integrity;
3) Local plate thickness becomes smaller;
4) Reduce the use of buried blind holes and reduce the difficulty of PCB production.
3. What is the function of back drilling?
The function of back drilling is to drill out the through-hole sections that do not play any role in connection or transmission, to avoid reflection, scattering, delay, etc. of high-speed signal transmission, and to bring "distortion" to the signal. Research has shown that the signal integrity of the signal system is affected. The main factors include design, board materials, transmission lines, connectors, chip packaging and other factors, but the vias have a greater impact on signal integrity.
4. Working principle of back drilling production
Relying on the micro-current generated when the drill tip touches the copper foil of the substrate surface when the drill bit is drilled down to sense the height of the board surface, and then drill down according to the set drill depth, and stop the drill when it reaches the drill depth. As shown in Figure 2, the working diagram is shown
5. Back drill production process?
a. Provide a PCB with positioning holes on the PCB, and use the positioning holes to drill and position the PCB and drill holes;
b. Electroplating the PCB after a drill hole, and dry film sealing the positioning holes before electroplating;
c. Make outer layer graphics on the electroplated PCB;
d. Perform pattern electroplating on the PCB after the outer layer pattern is formed, and perform dry film sealing treatment on the positioning holes before the pattern electroplating;
e. Use the positioning hole used by a drill for back drilling positioning, and use a drill to back drill the electroplated holes that need to be back drilled;
f. After back drilling, wash the back drilling with water to remove the residual drill chips in the back drilling.
6. If there is a hole in the circuit board, how to solve it from the 14th layer to the 12th layer?
1) If the board has a signal line on the 11th layer, there are through holes at both ends of the signal line to connect to the component surface and the solder surface, and the components will be inserted on the component surface, as shown in the figure below, that is, On this line, the signal is transmitted from component A to component B through the 11th layer signal line.
2) According to the signal transmission situation described in point 1, the function of the through hole in the transmission line is equivalent to the signal line. If we do not perform back drilling, the signal transmission route is shown in Figure 5.
3) From the figure described in point 2, we can see that in the first good transmission process, the through-hole section from the solder surface to the 11th layer does not actually play any link or transmission function. The existence of this section of through holes is likely to cause reflection, scattering, delay, etc. of signal transmission. Therefore, back drilling is actually to drill out the through hole section that does not play any link or transmission function to avoid reflection, scattering, etc. of signal transmission. Delay, bring distortion to the signal.
Due to certain tolerance control requirements for drilling depth and plate thickness tolerances, we cannot meet the absolute depth requirements of customers 100%. So, should the back drilling depth control be deeper or shallower? Our view of craftsmanship is that it is more shallow than deep, as shown in Figure 6.
7. What are the technical characteristics of the back drilling plate?
1) Most backplanes are hard boards
2) The number of layers is generally 8 to 50 layers
3) Board thickness: 2.5mm or more
4) Thick diameter is relatively large
5) Larger board size
6) Generally, the minimum hole diameter of the first drill>=0.3mm
7) There are fewer outer lines, and most of them are designed with a square array of crimp holes
8) Back drilling is usually 0.2mm larger than the hole that needs to be drilled
9) Tolerance of back drilling depth: +/-0.05MM
10) If the back drilling requires drilling to the M layer, the minimum thickness of the medium from the M layer to the M-1 (the next layer of the M layer) layer is 0.17mm
8. What are the main applications of the back drilling plate?
Backplanes are mainly used in communication equipment, large servers, medical electronics, military, aerospace and other fields. Since military and aerospace are sensitive industries, domestic backplanes are usually provided by military and aerospace systems research institutes, R&D centers, or PCB manufacturers with strong military and aerospace backgrounds. In China, the demand for backplanes mainly comes from the communications industry. The growing field of communication equipment manufacturing.
Realize back drill file output in Allegro
1. First select the back drill Net and define the length. Click Edit-Properties in the menu bar to open the dialog Edit property, as shown below:
2. Click in the menu: Manufacturing-NC- Backdrill Setup and Analysis, as shown in the figure below:
3. Back drilling can start from the top layer or the bottom layer. Both the connection pins and VIA on high-speed signals need to be back drilled. The settings are as follows:
4. Drilling files are as follows:
5. Pack the back-drilling hole file and the back-drilling hole depth form together and send it to the PCB factory. The back-drilling depth form needs to be filled in manually
Some related properties
1. BACKDRILL_MAX_PTH_STUB(net): In the constraint manager, the back-drilled network needs to be assigned the BACKDRILL_MAX_PTH_STUB attribute. Only when the attribute is set, the software will recognize that this network needs to consider back-drilling.
In the constraintmanager-net-general properties-worksheet-backdrill item, select the desired item and click the right mouse button, select the change command in the pop-up shortcut menu, and enter the maximum stub value. The calculation principle of stub is that both top and bottom stubs will be counted into the maximum stub length.
2. BACKDRILL_EXCLUDE attribute: After defining this attribute, the related target will not perform back drilling. This attribute can be assigned to symbol, pin, via, and even the attribute can be attached when building the library.
3. BACKDRILL_MIN_PIN_PTH attribute: to ensure the smallest through-hole metallization depth
4. BACKDRILL_OVERRIDE attribute: user-defined range of backdrill, this is also a more useful method, especially for the design of simple structure and consistent backdrill depth.
5. BACKDRILL_PRESSFIT_CONNECTOR property: This is the setting property for crimping parts. Generally, the back drilling will identify the crimping device and will not back drilling from the device surface. If back drilling is required on both sides.
The crimping device must be given the BACKDRILL_PRESSFIT_CONNECTOR attribute. For crimping devices, when single-sided or double-sided back-drilling is required, after specifying this parameter, the back-drilling depth will not enter the necessary effective connection area of the crimping device. Values, where values=pin contact range, this value must be obtained from the crimping device manufacturer.
After setting the properties of the backdrill, it is the analysis of the backdrill. Start the menu command: manufacture-NC backdrill setup and analysis, start the backdrill interface analysis window, select new pass set, set some backdrill parameters, and analyze A report will be generated later, and there will be detailed explanations where there are conflicts.
If there is no problem in the analysis, then the settings of the back drill are all completed. You need to select include backdrill in the post-processing light drawing output stage such as NC-Drill legend and NC Drill windows, and then execute to generate the back drill hole bitmap and Drill files.
Note that the PCB manufacturer’s back-drilling depth process capability needs to be communicated with the manufacturer.