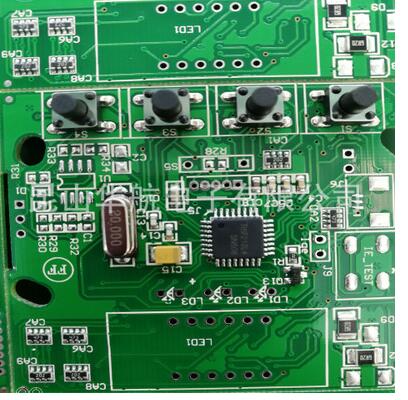
What are the PCB assembly steps?
With the development of PCBA assembly of electronic products in the direction of miniaturization and high assembly density, SMT surface mount technology has now become the mainstream technology of electronic assembly. However, due to the large size of some electronic components in the PCB assembly process, the plug-in processing has not been replaced, and still plays an important role in the electronic assembly process, so there will be a certain number in the PCB assembly Through-hole plug-in components. The assembly of both plug-in components and surface mount components is called hybrid assembly, or hybrid assembly for short, and assembly that uses all surface mount components is called full surface mounting. The PCB assembly method and its process flow mainly depend on the type of assembly components and the assembly equipment conditions. What are the steps involved in PCB assembly?
Step 1: Application of solder paste
This is the first step of PCB assembly (pcb assembly). Before adding components, you need to add solder paste. The solder paste needs to be added to the area of the circuit board to be coated with solder. Apply the solder paste on the circuit board with the help of the soldering screen. It is placed in the correct position on the chessboard, and the runner moves over it. This allows solder paste to be squeezed through the hole and applied to the circuit board.

Step 2: Place the components
This is done after applying solder paste. Surface mount technology (SMT) requires precise placement of components, which is difficult to achieve by manual placement. Therefore, the components are placed on the circuit board by means of a pick-and-place machine. The PCB design information provides the location where the components need to be placed and the component information required by the pick and place machine. This simplifies pick and place programming and makes it more precise.
What are the printed circuit board assembly steps
Step 3: Reflow oven
In this step, the actual connection occurs. After placing the components, place the circuit board on the conveyor belt of the reflow oven. The solder applied during the soldering process melts during reflow soldering. This permanently connects the component to the circuit board.
Step 4: Wave soldering
In this step, the printed circuit boards are placed on a system driven by a mechanical conveyor and pass through different areas. The PCB passes through the molten solder wave, which helps to connect the PCB pads/holes, electronic component leads and solder. This helps to form an electrical connection. It should be noted that different selective wave soldering processes can be selected according to the number of components on the bottom surface. Different processes have different requirements for the spacing and orientation of the components. You can refer to the layout requirements of the board components.
Step 5: Clean the PCB
It is very important to clean the PCB after assembly. This process helps to clean all flux residues with the help of ionized water.
Step 6: Check PCB components
This is one of the most important steps in PCB assembly. Techniques such as X-ray and AOI are used to determine the quality of the assembled PCB. In this step, check the circuit board for short circuits, loose solder balls, and bridges between solder balls.
Step 7: Test the board and monitor the output
This is the last step of the whole process. This step involves monitoring whether the product provides the desired output. The board is tested and analyzed for failures through several methods.
In the soldering process, the variables with the smallest variables should belong to the machinery and equipment, so they are the first to be checked. In order to achieve the correctness of the inspection, an independent electronic instrument can be used to assist, such as using a thermometer to detect various temperatures and using an electric meter to accurately calibrate machine parameters. .