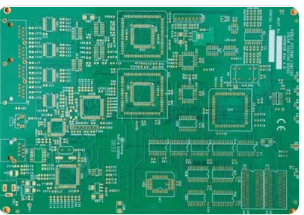
PCB circuit board-PCB circuit board adjustment wiring can effectively prevent static electricity. Usually when we design PCB boards, we will use layering, reasonable layout and installation to integrate the anti-ESD design of PCB circuit boards. Throughout the PCB design process, most of the design changes can be limited to the addition or reduction of components through prediction. Among them, adjusting the layout and routing is the most effective way, which can play a very useful role in preventing ESD on the circuit board.
The static electricity from the human body, the environment, and the electronic equipment can cause various damages to precision semiconductor chips, such as penetrating the thin insulating layer inside the components; destroying the gates of MOSFET and CMOS components; trigger locks in CMOS devices Dead; short-circuit reverse-biased PN junction; short-circuit forward-biased PN junction; melting the solder wire or aluminum wire inside the active device. In order to eliminate electrostatic discharge (ESD) interference and damage to electronic equipment, a variety of technical measures need to be taken to prevent it.
In the design of the PCB board, the anti-ESD design of the PCB can be realized through layering, proper layout and installation. In the design process, the vast majority of design modifications can be limited to the increase or decrease of components through prediction. By adjusting the PCB layout and routing, ESD can be well prevented. The following are some common precautions.

Use multi-layer PCBs as much as possible. Compared with double-sided PCBs, the ground plane and power plane, as well as the tightly arranged signal line-ground spacing can reduce the common mode impedance and inductive coupling, making it 1/of the double-sided PCB. 10 to 1/100. Try to put each signal layer close to a power layer or ground layer as much as possible. For high-density PCBs with components on the top and bottom surfaces, short connection lines, and many filling grounds, you can consider using inner layer lines.
For double-sided PCBs, tightly interwoven power and ground grids are used. The power line is close to the ground line, and as many connections as possible between the vertical and horizontal lines or the filled area. The grid size on one side is less than or equal to 60mm. If possible, the grid size should be less than 13mm.
to ensure that each circuit is as compact as possible.
Put all the connectors aside as much as possible.
If possible, lead the power cord from the center of the card and keep it away from areas that are directly affected by ESD.
On all PCB layers below the connector leading to the outside of the chassis (which is easy to be directly hit by ESD), place a wide chassis ground or a polygonal fill ground, and connect them together with vias at a distance of about 13mm.
Place mounting holes on the edge of the card, and connect the top and bottom pads with no solder resist around the mounting holes to the chassis ground.
During PCB assembly, do not coat any solder on the top or bottom pads. Use screws with built-in washers to achieve close contact between the PCB and the metal chassis/shielding layer or the support on the ground plane.
The same "isolation zone" should be set between the chassis ground and circuit ground of each layer; if possible, keep the separation distance of 0.64mm.
At the top and bottom layers of the card near the mounting holes, connect the chassis ground and the circuit ground with a 1.27mm wide wire every 100mm along the chassis ground. Adjacent to these connection points, place pads or mounting holes for mounting between the chassis ground and the circuit ground. These ground connections can be cut with a blade to keep the circuit open, or jumper with magnetic beads/high-frequency capacitors.
If the circuit board will not be placed in a metal chassis or shielding device, solder resist should not be applied to the top and bottom chassis ground wires of the circuit board, so that they can be used as discharge electrodes for ESD arcs.
To set a ring ground around the circuit in the following way:
(1) In addition to the edge connector and the chassis ground, a circular ground path is placed around the entire periphery.
(2) Ensure that the annular ground width of all layers is greater than 2.5mm.
(3) Connect annularly with via holes every 13mm.
(4) Connect the ring ground to the common ground of the multilayer circuit.
(5) For double panels installed in metal cases or shielding devices, the ring ground should be connected to the common ground of the circuit. For unshielded double-sided circuits, the ring ground should be connected to the chassis ground. Solder resist should not be applied to the ring ground, so that the ring ground can serve as a discharge bar for ESD, and it should be placed at a certain position on the ring ground (all layers). A 0.5mm wide gap, which can avoid the formation of a large loop. The distance between the signal wiring and the ring ground should not be less than 0.5mm.
The above is about the anti-static function that needs to be considered when designing PCB circuit boards. It can be seen that this detail is often important to PCB. Whether it is a new entry technician or an experienced old technician, these conventional precautions should be fully understood., And treated as special details in the design.