Electronic enthusiasts often have to make PCB double-sided boards when doing some experiments or productions. At this time, they are very troublesome. They use various methods such as sticking tape, drawing paint, and cutting with a knife, but the processes are complicated, time-consuming, and ineffective.

I recently went online, through online communication, plus some of my own experience, I found a fast and good method of plate making, here I will introduce it to everyone:
First of all, I purchased a plastic molding machine on the market, which is specially used to press documents, photos and other plastic packaging machines. The cheap one is only 220 yuan, and it can pass A3 paper vertically. Then look for a few flat self-adhesive papers with no cut marks, and use only the backing paper, that is, the light yellow side with the smooth surface. It is best to buy a special backing paper, which is also sold online, about 40 yuan for 100 sheets of A4 format. As long as the above two items are purchased, the printed boards can be trial-produced.
The printed layout is designed on the computer through circuit-making software such as PROTEL99. It is recommended to consider the following points when designing:
1. It is advisable for the thinnest trace width to be no less than 15mil .
2. Try to use SMD components. The use of SMD components can reduce the volume and improve reliability. Especially superior is that the workload of punching is greatly reduced. 1206 specification SMD resistors and capacitors are more suitable and convenient for manual welding. Cross-line can be replaced by 0 ohm resistors.
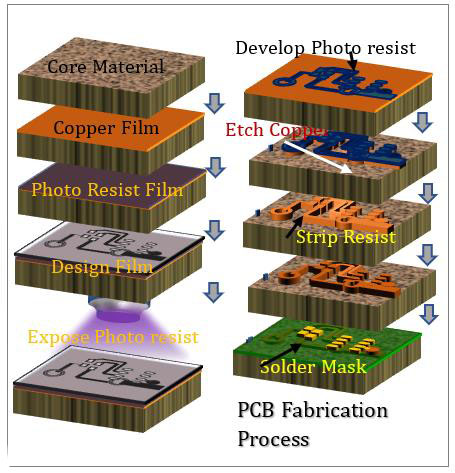
After the design is completed, set "Mirror Image Print" in the "Print Settings" of PROTEL99, and set the pads to "Hollow Print", and then use a laser printer to print the image on a piece of plain paper. After checking that it is correct, cut a piece The backing paper that is larger than the printed board image, with the smooth side facing up, is pasted on the newly printed board image, and the four corners can be fixed with self-adhesive. Send it to the laser printer for printing again, and then the designed mirror image is printed on the smooth backing paper.
After, cut a suitable copper clad laminate, preferably a circle larger than the drawing. First polish it with polishing sandpaper, then wipe it with a rubber, and finally wash it with detergent or detergent, and dry it. Note that this process cannot save trouble, and the cleaned circuit board should not come into contact with any other substances, including not touching it with your hands. Any stains and perspiration invisible to the naked eye on the copper clad laminate will affect the final transfer effect. Place the printed backing paper graphics face down and paste it on the copper clad board, and use self-adhesive paper around it to flatten and stick it firmly.
Next, I took out the molding machine. Since the pasting machine passes thin paper such as photos and certificates when it leaves the factory, you need to remove and adjust the distance between the upper and lower heating rollers. Turn on the plastic machine, set the temperature at about 180 degrees, send the patterned copper clad laminate into the plastic packaging machine, and pass it through 5-6 times repeatedly. Take it out and let it cool naturally. Then carefully peel off the transfer paper. At this time, the toner on the backing paper will be transferred to the copper clad laminate, and the board will appear exactly the same as on the computer screen, which is unconventional and beautiful.
If you are making a double-sided circuit board, you can follow the steps below:
1. Prepare side A according to the above method, and paste all the copper foil on side B with adhesive paper to protect it before corrosion;
2. After making the A side, use a small electric drill to punch out all the holes on the board (component mounting holes, vias, fixed mounting holes, etc.), and remove the burrs on the edge of the holes;
3. Align the printing plate with the light source, align the light from the B-side transfer paper through the hole to the B-side pad, and then stick the transfer paper firmly on the four sides with adhesive paper;
4. Send the printing plate into the plastic machine again, and transfer according to the above method;
5. Put the transferred printing plate into the corrosive liquid again, and don't forget to protect the A side with adhesive tape before corroding;
6. After the corrosion is finished, remove the adhesive and toner on the printing plate, polish it with fine sandpaper, and a standard and beautiful circuit board is made.
It should be noted that metalized vias cannot be achieved under amateur conditions. The alternative method is to use short wires to directly solder the A and B side vias of the printing plate. Therefore, if you are an amateur making PCB double-sided boards, try to use the pin holes of in-line components as vias in the design, so that the number of individual vias can be reduced.
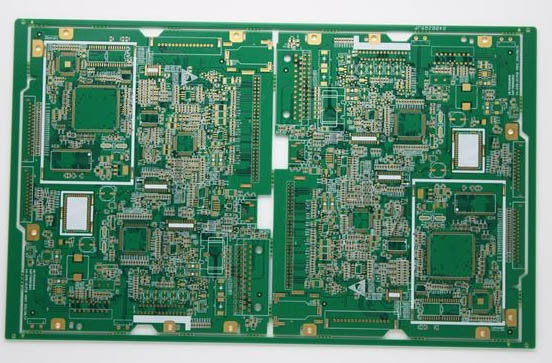
To be honest, it’s okay to make do with what I said above, but if you make a standard and good-looking board, you can’t get it. It’s even more difficult to make a complex board. It’s better to hand it to the factory for proofing, and the cost is not expensive. .
Electronic enthusiasts often have to make PCB double-sided boards when doing some experiments or productions. At this time, they are very troublesome. They use various methods such as sticking tape, drawing paint, and cutting with a knife, but the processes are complicated, time-consuming, and ineffective. good.
I recently went online, through online communication, plus some of my own experience, I found a quick and good method of plate making.
First of all, I purchased a plastic molding machine on the market, which is specially used to press documents, photos and other plastic packaging machines. The cheap one is only 220 yuan, and it can pass A3 paper vertically. Then look for a few flat self-adhesive papers with no cut marks, and use only the backing paper, that is, the light yellow side with the smooth surface. It is best to buy a special backing paper, which is also sold online, about 40 yuan for 100 sheets of A4 format. As long as the above two items are purchased, the printed boards can be trial-produced.
The printed layout is designed on the computer through PROTEL99 and other circuit-making software. It is recommended to consider the following points when designing:
1. It is advisable for the thinnest trace width to be no less than 15mil.
2. Try to use SMD components. The use of SMD components can reduce the volume and improve reliability. Especially superior is that the workload of punching is greatly reduced. 1206 specification SMD resistors and capacitors are more suitable and convenient for manual welding. Cross-line can be replaced by 0 ohm resistors.
After the design is completed, set "Mirror Image Print" in the "Print Settings" of PROTEL99, and set the pads to "Hollow Print", and then use a laser printer to print the image on a piece of plain paper. After checking that it is correct, cut a piece The backing paper that is larger than the printed board image, with the smooth side facing up, is pasted on the newly printed board image, and the four corners can be fixed with self-adhesive. Send it to the laser printer for printing again, and then the designed mirror image is printed on the smooth backing paper.
After, cut a suitable copper clad laminate, preferably a circle larger than the drawing. First polish it with polishing sandpaper, then wipe it with a rubber, and finally wash it with detergent or detergent, and dry it. Note that this process cannot save trouble, and the cleaned circuit board should not come into contact with any other substances, including not touching it with your hands. Any invisible stains and perspiration on the copper clad laminate will affect the final transfer effect. Place the printed backing paper graphics face down, and paste it on the copper clad board, and use self-adhesive paper around it to flatten and stick it firmly.
Next, I took out the molding machine. Since the pasting machine passes thin paper such as photos and certificates when it leaves the factory, you need to remove and adjust the distance between the upper and lower heating rollers. Turn on the plastic machine, set the temperature at about 180 degrees, send the patterned copper clad laminate into the plastic packaging machine, and pass it through 5-6 times repeatedly. Take it out and let it cool naturally. Then carefully peel off the transfer paper. At this time, the toner on the backing paper will be transferred to the copper clad laminate, and the board will appear exactly the same as on the computer screen, which is unconventional and beautiful.
After, you can use hydrochloric acid + hydrogen peroxide as the corrosive solution to corrode the circuit board. Because the chemical reaction is relatively violent, you only need to shake the container slightly during the corrosion process, and do not shake it to a large extent. This process can be completed in about half a minute. Take out the copper clad laminate in time and rinse it with tap water, then use fine sandpaper to remove the toner, and a circuit board that is exactly the same as the computer design is made.
If you are making a double-sided circuit board, you can follow the steps below:
1. Prepare side A according to the above method, and paste all the copper foil on side B with adhesive tape to protect it before corrosion;
2. After making the A side, use a small electric drill to punch out all the holes on the board (component mounting holes, vias, fixed mounting holes, etc.), and remove the burrs on the edge of the holes;
3. Align the printing plate with the light source, align the light from the B-side transfer paper through the hole to the B-side pad, and then stick the transfer paper firmly on the four sides with adhesive paper;
4. Send the printing plate into the plastic machine again, and transfer according to the above method;
5. Put the transferred printing plate into the corrosive liquid again, and don't forget to protect the A side with adhesive tape before corroding;
6. After the corrosion is finished, remove the adhesive and toner on the printing plate, polish it with fine sandpaper, and a standard and beautiful circuit board is made.
It should be noted that metalized vias cannot be achieved under amateur conditions. The alternative method is to use short wires to directly solder the A and B side vias of the printing plate. Therefore, if you are an amateur making PCB double-sided boards, try to use the pin holes of in-line components as vias in the design, so that the number of individual vias can be reduced.
To be honest, it’s okay to make do with what I said above, but if you make a standard and good-looking board, you can’t get it. It’s even more difficult to make a complex board. It’s better to hand it to the factory for proofing, and the cost is not expensive.
The above is the introduction of PCB double-sided plate making methods and steps. Ipcb is also provided to PCB manufacturers and PCB manufacturing technology.