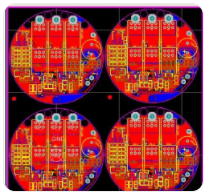
PCB manual wiring and wiring tips for the introduction of PCB design: Wiring is the process of connecting components on the board through traces and vias. Altium Designer simplifies this work by providing advanced interactive routing tools and Situs topology auto-router, which can optimize the routing of the entire board or part of it at the touch of a button.
The automatic wiring provides a simple and powerful layout method. In some cases, the user will need to precisely control the wiring layout, or the user may want to enjoy the fun of manual wiring! In these cases you can manually route part or the entire board. In this section of the tutorial, we will manually route the single board, placing all the wires on the bottom of the board. Interactive routing tools can provide maximum routing efficiency and flexibility in a more intuitive way, including cursor navigation when placing wires, single-click routing of contacts, pushing or bypassing obstacles, automatic tracking of existing connections, etc. And so on, these operations are based on the available design rules.
We now place the wires on the bottom layer of the board under the guidance of the "ratsnest" connecting wires.

The line on the PCB is composed of a series of straight line segments. Each change of direction is the beginning of a new line segment. In addition, by default, Altium Designer will limit the routing to vertical, horizontal or 45 ° directions, making your design more professional. This limit can be set to meet the needs of users, but for this PCB tutorial, we will use the default value.
1. Use the shortcut key L to display the View Configurations dialog box, in which Bottom Layer can be enabled and displayed. In the Signal Layers area, select the Show option next to Bottom Layer. Click OK, and the bottom label is displayed at the bottom of the design window.
2. Select Place>>Interactive Routing [shortcut keys: P, T] in the menu or click the Interactive Routing button. The cursor will change to a crosshair, indicating that the user is in online placement mode.
Manual routing Check the layer label at the bottom of the document workspace. The Top Layer tab should currently be active. By pressing the * key, you can switch to the bottom layer without exiting the wiring mode. This key cycles through the available signal layers. The Bottom Layer tab will be activated.
3. Position the cursor on the lower pad of header Y1. Click or press ENTER to determine the starting point of the first point of the line.
4. Move the cursor to the pad under the resistor R1. Note: How the line segment follows the cursor path to be displayed in the inspection mode (as shown in the figure above). The checked pattern shows that they have not been placed yet. If the user pulls back along the cursor path, the disconnected line will also be retracted. Here, users have two options for routing:
a.CTRL+click to use the Auto-Complete function, and immediately complete the wiring (this technology can be directly used on the pad or connection line). The start and end pads must be routed in the same layer to be effective, and any obstacles on the board are also required to not hinder Auto-Complete's work. For larger boards, the Auto-Complete path may not always be effective. This is because the trace path is drawn section by section, and the complete drawing from the start pad to the end pad may not be completed at all. .
b. Use ENTER or click to wire, the user can directly wire the target R1 pin. This method provides control for routing and minimizes the number of user operations.
5. Unplaced lines are represented by dashed lines, and placed lines are represented by solid lines.
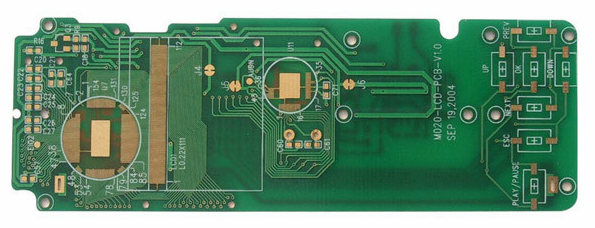
6. Use any of the above methods to route between other components on the board. Figure 6-26 shows a manually wired board.
7. Save the design [shortcut key: F, S or Ctrl + S].
The interactive routing tool of ltium Designer provides functions that can be used to resolve conflicts and obstacles during routing. In the interactive routing mode, traverse these modes by using SHIFT+R. The available modes are:
Push-This mode will try to move objects (lines and holes), they can be repositioned to fit the new wiring.
Wwalkaround-This mode will try to find a routing path to bypass the existing obstacles without moving them.
Hug&Push--This mode combines the functions of Walkaround and Push. It will bypass obstacles, but it will also consider using Push mode to treat fixed obstacles.
Ignore-This mode allows users to wire anywhere.
In the interactive wiring process, if you try to route to an area, the Push or Hug & Push mode still cannot complete the wiring, and the prompt that the wiring cannot be completed will appear immediately.
Please keep the following points in mind when it comes to PCB layout:
Click or press ENTER to place the line at the current cursor position. The check mode represents the lines that have not been laid out, and the laid out lines will be displayed as entities in the color of the current layer.
Use CTRL+click at any time to perform automatic connection completion. The start and end pins must be on the same layer, and there are no conflicts and obstacles that cannot be resolved.
Use Shift + R to traverse Push, Walkaround, Hug and Push and Ignore modes.
Use Shift +SPACEBAR to select various line angle modes. Angle modes include: any angle, 45 °, 45 ° of arc, 90 ° and 90 ° of arc. Press the space bar to switch the angle.
• Press the END key at any time to refresh the screen.
Use V, F at any time to re-adjust the screen to fit all objects.
Press the PAGE UP and PAGE DOWN keys at any time to zoom the view with the cursor position as the core. Use the mouse wheel to pan to the left and right. Hold down the CTRL key and use the mouse wheel to zoom in and out.
Press the BACKSPACE key to cancel placing the previous line.
When you finish the PCB routing and want to start a new routing, right-click or press the ESC key.
Prevent accidentally connecting pins that should not be connected together.
Altium Designer constantly monitors the connectivity of the board and prevents users from making mistakes in connection.
To delete the line, click to select it. Its editing operation will appear (the rest of the lines will be highlighted). Press the DELETE key to clear the selected line segment.
Rewiring is very simple-when the user finishes laying out a line and right-clicks to finish, the redundant line segments will be automatically cleared.
After completing all the connections on the PCB, as shown in the figure above, right-click or press the ESC key to exit the prevent placement mode.