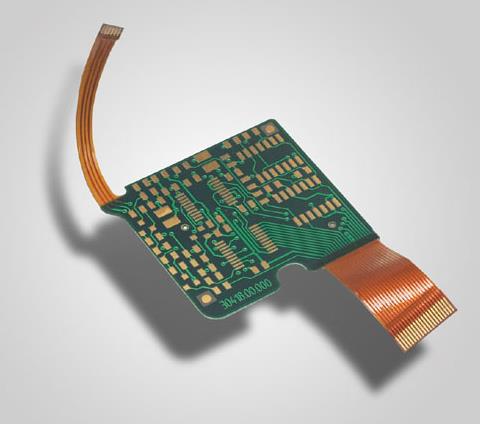
The focus of this article is on the use of IP by PCB board designers, and further use of topology planning and routing tools to support IP to quickly complete the entire PCB board design. The design engineer's job is to obtain IP by laying out a small number of necessary components and planning critical interconnect paths between those components. Once the IP is obtained, the IP information can be provided to the PCB board designer, who can complete the rest of the design.
Design engineers obtain IP, and PCB board designers further use topology planning and routing tools to support IP and quickly complete the entire PCB board design. Now there is no need to go through the interaction and iterative process between the design engineer and the PCB board designer to get the correct design intent, the design engineer already has this information, and the results are comparable, which is very helpful for the PCB board designer. In many designs, the design engineer and the PCB board designer perform interactive placement and routing, which consumes a lot of valuable time on both sides. Interaction is necessary but time-consuming and inefficient. The initial plan provided by the design engineer maybe just a hand drawing without proper scale components, bus widths, or pin-out hints. As the PCB board designer is involved in the design, although the engineer using topology planning techniques can obtain the layout and interconnection of some components, the design may also require the layout of other components, access to other IO, and bus structures, and all interconnections. even to complete. PCB board designers need to adopt topology planning and interact with the components that have been laid out and those that have not been laid out. This can form layout and interaction plans, thereby improving the efficiency of PCB board design.

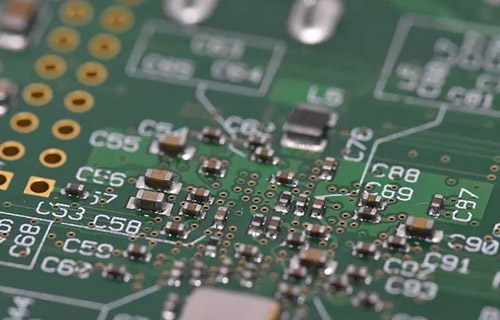
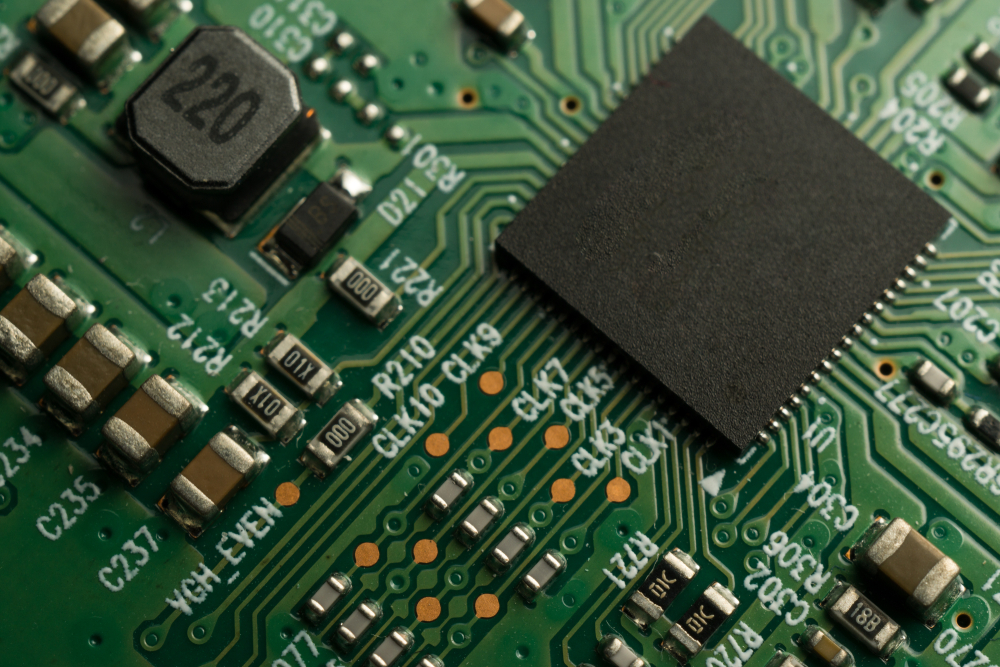
As the layout of critical areas and high-density areas is completed and the topology plan is obtained, the layout may be completed before the final topology plan. Therefore, some topological paths may have to work with existing layouts. Although they have a lower priority, they still need to be connected. Thus a part of the plan is created around the components after the layout. Additionally, this planning may require more detail to provide the necessary priority for other signals. Detailed topology planning, in order to plan this bus, the PCB board designer needs to consider some existing obstacles, design rules of each layer, and other important constraints. Detail "1" plans the component pins on the top layer of "red" to lead out from the component pins and connect to the topological path at detail "2". This part uses the unpackaged area and only identifies the layer as a routable layer. Doing this may seem obvious from a design perspective, and the routing algorithm will use the top-level connections to the topological paths in red. However, some obstacles may give the algorithm the option of routing other layers before autorouting this particular bus. With the bus organized into tight traces on the layers, the designer starts planning the transition to layer 3 at detail "3" and considers the distance the bus travels across the board. Note that this topological path on layer 3 is wider than the top layer because of the extra space required to accommodate the impedance. In addition, the design specifies the exact location (17 vias) for layer transitions. When the topological path goes to detail "4" along the middle right part of Figure 3, many single-bit T-junction points need to be drawn from the topological path connection and each component pin. The PCB board designer's choice is to keep most of the connection flow on layer 3 and penetrate to other layers for connecting component pins. So they drew a topology area to indicate the connection from the main harness to layer 4 (pink), made these single-bit T-junctions to layer 2, and then used other vias to connect to the device pins. The topological path continues on layer 3 to detail "5" to connect active devices. These connections are then made from the active pins to the pull-down resistors under the active device. Designers use another topology area to specify connections from layer 3 to layer 1, where the component pins are divided between active devices and pull-down resistors. This level of detailed planning took only about 30 seconds to complete. Once this plan has been captured, the PCB board designer may want to route immediately or create further topology plans and then use auto-routing to complete all topology plans. It takes less than 10 seconds from planning completion to automatic routing results. The speed doesn't really matter, in fact, it's a complete waste of time if you ignore the designer's intent and the auto-routing quality is poor. The following figures show the results of auto-routing.
Topology Routing
Starting from the upper left corner, all wires coming out of the component pins follow the designer's expressed intent on layer 1 and are compressed into a tight bus structure, as detailed in "1" and "2" in Figure 4. The transition between layer 1 and layer 3 occurs at detail "3" and takes the form of a space-intensive via. To reiterate, impedance is taken into account here, so the traces are wider and have more space, as represented by the actual width paths. The 17 bits are detailed into 4 different device types and represent the designer's intent for layer and path flow, which can be captured in about 30 seconds. Then you can perform high-quality automatic routing, which takes about 10 seconds. By raising the level of abstraction from routing to topology planning, the total interconnect time is greatly reduced, and the designer has a really clear understanding of the density and the potential to complete the design before interconnecting begins, such as why the routing will be Stay at this point of the design? Why not go ahead and plan and add traces later? When does the planning of the complete topology take place? If the above example is considered, the abstraction of one plan can be used with another plan instead of 17 separate nets with many line segments and many vias on each net, when considering engineering change orders (ECO, Engineering This concept is especially important when changing Orders.
Engineering Change Order (ECO)
In the example below, the pin-out of the FPGA is not yet complete. The design engineer has informed the PCB board designer of this reality, but due to scheduling reasons, they need to move the design forward as much as possible before the FPGA pinout is complete. With the pinout known, the PCB board designer begins to plan the space for the FPGA, and while the designer completes the plan, it is also necessary to consider the leads from other devices to the FPGA. The IO was originally planned on the right side of the FPGA, but now it is located on the left side of the FPGA, causing the pin output to be completely different from the original plan. Because designers work at a higher level of abstraction, they can accommodate these changes by removing the overhead of moving all traces around the FPGA and replacing them with topological path modifications. However, it's not just FPGAs that are affected; these new pinouts also affect the leads coming out of the associated device. To accommodate the lead entry path of the flat-pack, the end of the path must also be moved; otherwise, twisting the traces will result, in wasting valuable space on high-density PCB boards. Twisting for these bits requires extra space for traces and vias, which may not be met at the end of the design. If the schedule is tight, it is impossible to make such adjustments to all of these routings. The point is that topology planning provides a higher level of abstraction, so implementing these ECOs is much easier. An auto-routing algorithm designed to follow the designer's intent sets quality priority over quantity priority. If it is determined that there is a quality problem, letting the connection fail is better than producing a poor quality cabling, and doing so is quite right for two reasons. First, it's easier to make a dead connection than to clean up such a trace with bad results and other auto-routing operations. Second, the designer's intent is implemented and the designer is left to determine the quality of the connection. However, these points are only useful if the connections of the failed traces are relatively simple and localized. A good example is the inability of the router to achieve 100% planned connections. Instead of sacrificing quality at this point, allow some planning to fail, leaving some unconnected traces. All traces are routed through topology planning, but not all lead to component pins. This ensures that there is some room for dead connections and provides a relatively easy connection to connect.
Topology planning is a tool that accompanies the design process of PCBs with digital signals and is easy for design engineers to use, but it also has specific space, layer, and connection flow capabilities for complex planning considerations. PCB board designers can use the topology planning tool at the beginning of the design or after the design engineer has acquired their IP, depending on who uses this flexible tool to easily fit into their design environment. Topology Router simply follows the designer's plan or intent to provide high-quality routing results. When faced with ECOs, topology planning is much faster to operate than individual connections, thus enabling topology routers to adopt ECOs faster, providing fast results on the PCB board.