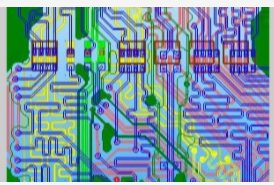
In the current society, a large number of electronic products are widely used in our daily work and life, so their reliability needs to be guaranteed, and most electronic systems and equipment through printed circuit boards must have reasonable PCB design principles Figure, the correct printed circuit boards can fundamentally improve their reliability. For example, if two printed thin parallel lines are very close, the signal waveform will be delayed, and a large amount of reflected noise will eventually be formed on the terminal equipment.
First, the design points of the ground wire
Most of the interference problems in electrical equipment can be solved by correct shielding and reasonable grounding, so we must pay enough attention to grounding design work. The grounding system is composed of four parts: analog ground, digital ground, chassis ground, and system ground. The digital ground is also called logical ground, and the chassis ground is also called shield ground. Below we introduce several aspects that need to be paid attention to in grounding design:
1. Reasonably choose the grounding method
There are usually two grounding methods, multi-point grounding and single-point grounding, so we have to make a reasonable choice. When the working frequency of the equipment exceeds 10MHz, because the ground wire impedance is too large to bring adverse effects to the normal operation of the equipment, we should try to choose multiple grounding points to achieve the purpose of reducing the ground wire impedance. In the same way, when the working frequency of the circuit is less than 1MHz, we have to take a little grounding method to prevent the formed circulating current from affecting the interference. Therefore, the circuit within the operating frequency of 1-10MHz can be grounded at multiple points when the wavelength is within 20 times the length of the ground wire, otherwise a single-point grounding method is required.
2. Separate analog and digital circuits
Because the circuit board is very complicated, there are both linear circuits and telling logic circuits on it, so we should separate them to avoid confusion between the two, and avoid mixed connections by grounding the power terminals separately. At the same time, the grounding area of the linear circuit should be expanded as much as possible.
3. Choose a thicker ground wire
In the case of choosing a thinner ground wire, it will cause the change of the current to drive the change of the ground potential, and finally cause the electronic equipment to fail to operate stably, greatly reducing its anti-noise performance. Therefore, we have to choose a thicker ground wire and increase its allowable current to achieve the purpose of stabilizing the equipment signal. When conditions permit, choose a wire with a width of 3mm or more.
Second, the design points of electromagnetic compatibility
Because the working environment of electronic equipment is complex and changeable, we require it to have better electromagnetic environment adaptability and reduce electromagnetic interference to other electronic equipment. This requires corresponding design for electromagnetic compatibility, so electronic equipment The electromagnetic compatibility design is also one of the focuses of our work.
1. Choose the correct wiring method
In the PCB layout, the inductance of the wires can be greatly reduced by using the method of parallel routing, but it will cause the distributed capacitance and mutual inductance between the wires to increase, so if conditions permit, we can use the tic-tac-toe shape when wiring The specific wiring method is to adopt different wiring methods on the two sides of the printed board, one side is vertical, the other side is horizontal, and metalized holes are used to connect at the cross holes. Since there is still crosstalk between the printed board wires, we should control the long-distance parallel routing when it does not appear.
2. Choose the correct width of the wire. Because of the frequent impact and interference, we need to control the transient current when printing the wire. The main method is to control the inductance when the wire is printed. The amount of inductance is inversely proportional to the width of the wire, and proportional to the length of the inverted appearance, so we should try to choose some thick and short wires, which are very effective in suppressing interference. Since the signals of the bus driver, row driver and clock lead often have very large incidental currents, short wires should be selected when selecting the above-mentioned lines. For those integrated circuits, we should control the width of the wires between 1 and 0.2mm, and for discrete component circuits, the width should be controlled at about 1.5mm.
Third, the design points of the components and dimensions on the circuit board
The size of the printed circuit board should be moderate. When it is too large, the printed lines will be long and the impedance will increase, which will not only reduce the noise resistance, but also increase the cost. In terms of device layout, like other logic circuits, the devices related to each other should be placed as close as possible so that a better anti-noise effect can be obtained. Clock generators, crystal oscillators, and CPU clock input terminals are all prone to noise, so they should be closer to each other. It is very important that noise-prone devices, low-current circuits, and high-current circuits should be kept away from logic circuits as far as possible. If possible, separate circuit boards should be made.
Fourth, the key points of heat dissipation design
From the perspective of conducive to heat dissipation, the printed plate is best installed upright, the distance between the board and the board should not be less than 2cm, and the arrangement of the devices on the printed plate should follow certain rules:
For equipment that uses free convection air cooling, it is best to arrange integrated circuits (or other devices) in a vertical manner; for equipment that uses forced air cooling, it is best to arrange integrated circuits (or other devices) in a horizontal manner. .

Devices on the same printed circuit board should be arranged as far as possible according to their calorific value and degree of heat dissipation. Devices with small calorific value or poor heat resistance (such as small signal transistors, small-scale integrated circuits, electrolytic capacitors, etc.) w ww.pcbwork. net) is placed at the top of the cooling airflow (at the entrance), and devices with large heat or heat resistance (such as power transistors, large-scale integrated circuits, etc.) are placed at the most downstream of the cooling airflow. In the horizontal direction, high-power devices are placed as close as possible to the edge of the printed board to shorten the heat transfer path; in the vertical direction, high-power devices are placed as close as possible to the top of the printed board to reduce the impact of these devices on the temperature of other devices .
The temperature-sensitive device is best placed in the lowest temperature area (such as the bottom of the device). Never place it directly above the heating device. It is best to stagger multiple devices on the horizontal plane.
The heat dissipation of the printed board in the equipment mainly relies on air flow, so the air flow path should be studied during the design, and the device or printed circuit board should be reasonably configured. When air flows, it always tends to flow in places with low resistance. Therefore, many PCB factories should avoid leaving a large airspace in a certain area when configuring devices on the printed circuit board.