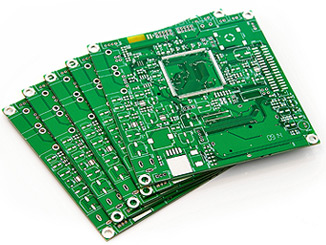
Reasonable arrangement of components is the basic premise of designing a high-quality PCB boardlayout.
1. Component layout
The requirements for component layout mainly include installation, force, heat, signal, and aesthetics.
1.1. Installation
Refers to a series of basic requirements for the smooth installation of the circuit board into the chassis, casing, and slot in a specific application, so as to avoid accidents such as space interference and short circuit, and to keep the designated connector in the designated position on the chassis or casing. Require. I won't go into details here.

1.2. Force
The circuit board should be able to withstand various external forces and vibrations during installation and work. For this reason, the circuit board should have a reasonable shape, and the positions of various holes (screw holes, special-shaped holes) on the board should be reasonably arranged. Generally, the distance between the hole and the edge of the plate should be at least greater than the diameter of the hole. At the same time, it should also be noted that the weak section of the plate caused by the special-shaped hole should also have sufficient bending strength. In particular, the connectors that "extend" directly out of the device shell on the board should be reasonably fixed to ensure long-term reliability.
1.3. Heat
For high-power devices with serious heat generation, in addition to ensuring heat dissipation conditions, attention should also be paid to placing them in appropriate positions. Especially in sophisticated analog systems, special attention should be paid to the detrimental effects of temperature fields generated by these devices on fragile preamp circuits. Generally, the part with very large power should be made into a separate module, and certain thermal isolation measures should be taken between it and the signal processing circuit.
1.4. Signals
Signal interference is an important factor to be considered in PCB layout design. Several basic aspects are: the weak signal circuit is separated or even isolated from the strong signal circuit; the AC part is separated from the DC part; the high frequency part is separated from the low frequency part; pay attention to the direction of the signal line; the layout of the ground wire; measure.
1.5. Beautiful
It is not only necessary to consider the neat and orderly placement of components, but also to consider the graceful and smooth wiring. Because the general layman sometimes emphasizes the former, in order to one-sidedly evaluate the pros and cons of the circuit design, for the image of the product, the former should be given priority when the performance requirements are not harsh. However, in high-performance occasions, if a double-sided board has to be used, and the circuit board is also encapsulated in it, it is usually invisible, and the aesthetics of the wiring should be emphasized first. The next section will discuss the "aesthetics" of the wiring in detail.
2. Wiring principles
Some anti-jamming measures not commonly found in the literature are detailed below. Considering that in practical applications, especially in product trial production, a large number of double-sided panels are still used, and the following contents are mainly aimed at double-sided panels.
2.1. Wiring "Aesthetics"
When turning, avoid right angles and try to use slashes or arcs for transitions. The wiring should be neat and orderly, and arranged in a centralized manner, which not only avoids the mutual interference of signals of different natures, but also facilitates inspection and modification. For digital systems, there is no need to worry about interference between signal lines (such as data lines and address lines) of the same camp, but control signals such as read, write, and clock should be isolated and protected with ground wires. When laying the ground on a large area (discussed further below), try to keep a reasonable and equal distance between the ground wire (in fact, it should be the ground "surface") and the signal wire, and try to be as close as possible on the premise of preventing short circuits and leakage. For weak current systems, the ground wire and the power wire should be as close as possible. For systems using surface mount components, the signal lines should go all the way to the front.
2.2. Ground wire arrangement
There are many discussions on the importance and layout principles of ground wires in the literature, but there is still a lack of detailed and accurate introduction to the ground wire layout in actual PCB boards. My experience is that in order to improve the reliability of the system (rather than just making an experimental prototype), the ground wire cannot be overemphasized, especially in weak signal processing. To this end, we must spare no effort to implement the principle of "large area paving".
2.3. Power line layout and power filter
The general literature says that the power cord should be as thick as possible, which I don't quite agree with. Only in the case of high power (the average power supply current may reach 1A in 1 second), it is necessary to ensure sufficient power line width (in my experience, 50mil per 1A current can meet the needs of most occasions). The width of the power line is not critical if it is only to prevent signal interference. Even, sometimes thinner power cords are more beneficial. The quality of the power supply generally lies not mainly in it, but in the fluctuation of the power supply and the superimposed interference. The key to solving power supply interference is filter capacitors! If your application has strict requirements on power quality, don't be stingy with the money for filter capacitors! Pay attention to the following when using filter capacitors: The power input end of the entire circuit should have " The total "filtering measures", and various types of capacitors should be matched with each other, "the same can not be less", at least the J that will not be a bad thing. For digital systems, at least 100uF electrolysis + 10uF tantalum + 0.1uF patch + 1nF patch . Higher frequency (100kHz) 100uF electrolysis + 10uF tantalum + 0.47uF patch + 0.1uF patch. AC simulation system: For DC and low frequency simulation system: 1000uF|1000uF electrolysis + 10uF tantalum + 1uF patch + 0.1uF patch. There should be a "set" of filter capacitors around every important chip. For digital systems, a 0.1uF patch is generally enough, an important chip or a chip with a large working current should also be connected with a 10uF chip tantalum or 1uF chip, and the chip with operating frequency (CPU, crystal) should also be connected with 10nF| 470pF or a 1nF. This capacitor should be as close as possible to the chip's power pins and connected as directly as possible, the smaller the closer. For chip filter capacitors, the inner section (filter capacitor to chip power pins) should be as thick as possible. It is better if multiple thin wires can be used side by side. With the filter capacitor to provide a low (AC) impedance voltage source and suppress AC coupling interference, the power line outside the capacitor pin (referring to the section from the main power supply to the filter capacitor) is not so important, the line width does not need to be too thick, at least It is not necessary to take up a lot of board area for this. In some analog systems, an RC filter network is also required for the power input to further suppress interference, and a thinner power line sometimes just acts as a resistor in the RC filter, which is beneficial. For systems with a wide range of operating temperature changes, it should be noted that the performance of aluminum electrolytic capacitors will be reduced or even lose the filtering effect at low temperatures. In this case, appropriate tantalum capacitors should be used instead. For example, replace 470uF aluminum with 100uF tantalum | 1000uF aluminum, or replace 100uF aluminum with 22uF sheet tantalum. Be careful not to place the aluminum electrolytic capacitor too close to the high-power heating device.
3. Experience in reducing noise and electromagnetic interference.
(1) High-speed chips are not needed if low-speed chips can be used, and high-speed chips are used in key places.
(2) A resistor can be connected in series to reduce the transition rate of the upper and lower edges of the control circuit.
(3) Try to provide some form of damping for relays etc.
(4) Use a frequency clock that meets the system requirements.
(5) The clock generator is as close as possible to the device using the clock. The quartz crystal oscillator case should be grounded.
(6) Circle the clock area with a ground wire, and keep the clock wire as short as possible.
(7) Use large-capacity tantalum capacitors or polycooled capacitors instead of electrolytic capacitors as circuit charge and discharge energy storage capacitors. When using tubular capacitors, the case should be grounded.
(8) The useless end of MCD should be connected to high, or grounded, or defined as an output end. The end of the integrated circuit that should be connected to the power supply ground should be connected, and should not be left floating.
(9) Do not float the input terminals of the gate circuits that are not in use, connect the positive input terminals of the operational amplifiers that are not in use to the ground, and connect the negative input terminals to the output terminals.
(10) The printed board should try to use 45-fold lines instead of 90-fold lines to reduce the external emission and coupling of high-frequency signals.
(11) The printed board is divided according to frequency and current switching characteristics, and the distance between noise components and non-noise components should be further away.
(12) Single-point power supply and single-point grounding for single-panel and double-panel, the power line and ground wire should be as thick as possible. If the economy can afford it, use a multi-layer board to reduce the capacitive inductance of the power supply and the ground.
(13) The clock, bus, and chip select signals should be kept away from I/O lines and connectors.
(14) The analog voltage input line and the reference voltage terminal should be as far away as possible from the digital circuit signal line, especially the clock.
(15) For A/D devices, the digital part and the analog part would rather be unified rather than handed over.
(16) The clock line perpendicular to the I/O line has less interference than the parallel I/O line, and the clock component pins are far away from the I/O cable.
(17) The component pins should be as short as possible, and the decoupling capacitor pins should be as short as possible.
(18) The key lines should be as thick as possible, and protective ground should be added on both sides. High-speed lines should be short and straight.
(19) The line sensitive to noise should not be parallel to the high current, high speed switching line.
(20) Do not route wires under the quartz crystal and under the devices that are sensitive to noise.
(21) For weak signal circuits, do not form current loops around low-frequency circuits.
(22) Do not form a loop for any signal. If it is unavoidable, make the loop area as small as possible.
(23) One decoupling capacitor per integrated circuit. A small high frequency bypass capacitor should be added beside each electrolytic capacitor.
(24) The signal entering the printed board should be filtered, and the signal from the high noise area should also be filtered. At the same time, the method of serial terminal resistance should be used to reduce the signal reflection. The I/O driver circuit is as close as possible to the edge of the PCB board, so that it can leave the printed circuit boards as soon as possible.