Cost control measures should be taken in the early PCB production stage, including the actual circuit development stage. Please pay attention to the process steps and cost drivers of rigid circuit boards, because each process consumes additional costs in terms of process time, materials used, energy, and waste disposal.
We need to keep in mind the production strategy, production equipment and multiple technologies to control the cost of rigid circuit boards. In this blog post, we want to point out the basic characteristics of PCBs, including the processes and manufacturing steps involved in PCB production, depending on their impact on cost.
The main cost drivers of rigid circuit boards
The process cost affects the final PCB price. Once the PCB design is completed, the cost cannot be reduced without redesigning the circuit board. Only by adopting accurate PCB design and correct engineering strategies can the lowest possible cost be achieved. If you want to optimize the cost, please follow the IPC-2220 and IPC-2226 standards.
PCB processing cost considerations
Classification of cost categories: The allocation of category I items is essential to achieve the required PCB design. The allocation of Class II and Class III depends on the use of the equipment and is therefore specific to the manufacturer. Costs can be reduced by reducing the requirements for categories II and III.
We divide the cost contribution factors into different categories. The motivation for this classification is to reduce the final cost. We cannot ignore the factors listed in Class I, but we can change the factors listed in II and III according to our requirements and final application.
For PCB designers and engineers, optimization is the primary factor. Optimize time, cost and even workload. Sierra Circuits strives to provide customers with high-quality PCBs and excellent design services. This includes best practice techniques for designers. When designing the next circuit board, you need to pay attention to some key rigid PCB cost drivers.
From concept to PCB manufacturing and assembly, there are several factors that affect the price of your circuit board. Typically, mechanical and/or electrical engineers determine circuit board requirements, such as dimensions, applicable industry standards, mechanical and electrical restrictions, and material characteristics. This is done to ensure that the board meets its target performance.
Once the engineer has a viable mechanical design and functional schematic, the PCB designer must carry out the CAD layout. After the layout is complete, the PCB manufacturer can start building the circuit board. Undoubtedly, the complexity of the design will have the most significant impact on the final cost of the circuit board, but the price will also mainly depend on the following cost drivers.

PCB size
The mechanical engineer must determine the size and shape of the PCB-also known as the PCB outline. The initial drawings are sent to the design team, and if possible, they can reduce the board outline. This is the first way to save money, because a smaller area can reduce PCB material costs. Here, the cost of your board of directors is a real estate issue-just like a home, the larger the cost, the higher. For example, imagine a 2'' x 2'' board. Now imagine a 4'' x 4'' board. The surface area is multiplied by four, so the basic price (of the material) will also be multiplied by four.
Smaller area means lower PCB material cost.
The bigger the panel, the higher the cost
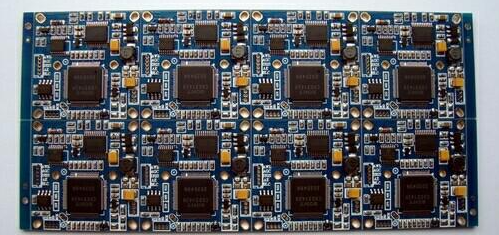
When you select a panel option, remember that it is just like the size of a circuit board. The larger the surface area, the higher your cost. Therefore, you can even pay for the waste part (faded green) that is thrown into the trash after assembly. If possible, place the circuit boards closer to each other on the panel to reduce waste and cost.
Appropriate panel size helps material utilization, thereby reducing costs.
All in all, the hard cost drivers you should consider during the concept phase are PCB outlines, layers, and their traces/spaces and vias. Choose the type of material you need carefully and try to avoid waste. Finally, remember that reducing machine time (for manufacturing and assembly) will also reduce costs.
Array considerations: This is a good practice when using panels to obtain maximum yield. Let's understand it through some examples:
Example 1: Panel size = 18 x 24"
Array size = 5.125 x 10.925"
The size of the array part (there are four parts in each array) = 2 x 4.9"
Panel yield: There are a total of 6 arrays, that is, a total of 24 parts. The material utilization rate is 77.8%. It indicates that the material on a given panel is well utilized.
Array considerations for maximum output.
Using HDI (High Density Interconnect) technology can reduce the number of layers.
Cost rises with PCB complexity
When switching from traditional PCB manufacturing technology to complex manufacturing technology, the cost will increase. This tendency towards more complex technologies is due to the final application requirements. But manufacturers should make wise decisions in order to minimize costs.
Interconnect size scaling: Once the interconnect size is reduced to meet application requirements, the cost will increase.
Microvia: The implementation of microvia structures will have a wide impact on PCB manufacturing because they directly affect the total number of lamination cycles and drilling steps in the design. It occurs in the substructure where the start and end layers of the micropores need to be considered. It will eventually increase costs because each substructure requires additional lamination and drilling cycles.
Copper foil weight
More copper on the PCB leads to higher costs.
Generally speaking, the thinner the copper, the cheaper the circuit board. During the lamination process, the use of thick copper on the inner layer requires more prepreg to fill the gaps between the areas composed of copper. Copper over ½oz in the inner layer and copper over 1oz in the outer layer will increase PCB cost.
Another disadvantage of using thicker copper is that you must maintain enough space between the traces, and you may also need to use a thicker prepreg material between two adjacent layers. However, if you use very thin copper (less than ¼ ounce), additional costs will be added because it is expensive to handle very thin copper.
Trajectory/space
The routing/space design will also increase the cost.
The tighter the trace/space, the more difficult it is to reliably etch traces and pads. Consider whether wire bonding or HDI design is more cost-effective in the long run. Sierra Circuits can make less than 3/3 of the trace/space.
The more drilling holes, the smaller the holes and the higher the cost
Smaller mechanical hole sizes are more difficult to manufacture.
Smaller mechanical hole sizes are more difficult to manufacture. They also require smaller drill bits, but at a higher cost. When you require holes smaller than 6 mils, laser drilling is usually necessary, which increases costs.
HDI PCB technology uses blind and buried vias, which will greatly increase the cost of the circuit board. They are more difficult to drill than through holes, and they also add a lamination step. Use them only if you don't have any other options available. For example, due to PCB size limitations, it makes sense to use these types of vias in HDI designs. If you encounter wiring problems, adding two more layers to the stack will be cheaper than using blind or buried vias.
The standard bit size is 8 mils, and the premium bit size is 5 mils. And the size of the research and development drill bit can be less than 5 mils. Please note that smaller hole sizes and thicker PCBs (high aspect ratios) will increase drilling time and drilling corrosion, leading to higher costs.
Drilling to copper is the distance from the edge of the drilled hole to the nearest copper feature (pad, pouring, trace, etc.) on the layer. The smaller the copper hole, the more expensive the PCB manufacturing process.
Controllable impedance
Having controlled impedance means designing and producing very specific and uniform trace width and space. More expensive materials with specific dielectric properties must be selected to ensure that the target electrical performance is achieved. Test specimens must be made to ensure that the PCB manufacturer meets the 15% tolerance of the standard. Sometimes, it is even 5% tolerance. More work, more coupon surface area, and more testing drive up the price of circuit boards.
Unless absolutely necessary, do not specify controlled impedance. This is why we put it in the important category.
Material selection criteria for cost optimization of rigid circuit boards
Compatible with lead-free solder (thermal reliability)
TG (temperature dependent reliability)
TCT, CTEz (temperature cycle reliability)
Degradation temperature (thermal reliability)
High thermal conductivity (heat transfer)
T260, T288 (layer time)
εr (Dk), Df (electrical signal performance)
CAF resistant
Mechanical properties (drop test, stiffness, etc.)
Halogen reduction (environmental protection characteristics)
Material selection
When moving to a higher position in the frequency diagram for a specific application, the choice of PCB material becomes critical. Cost control must be considered at the initial stage of PCB design. Intelligent design and sound engineering are always the best PCB design solutions with the lowest cost index. In order to obtain the most accurate cost estimate, it is recommended to consider the existing design scope and then adjust the requirements according to the estimated technology. These estimates will provide more relevant data points to make any cost of each technical decision and prevent surprises in the process after resources have been invested in the design.